
3 ways we use 3D tools to enhance our clients’ product photography
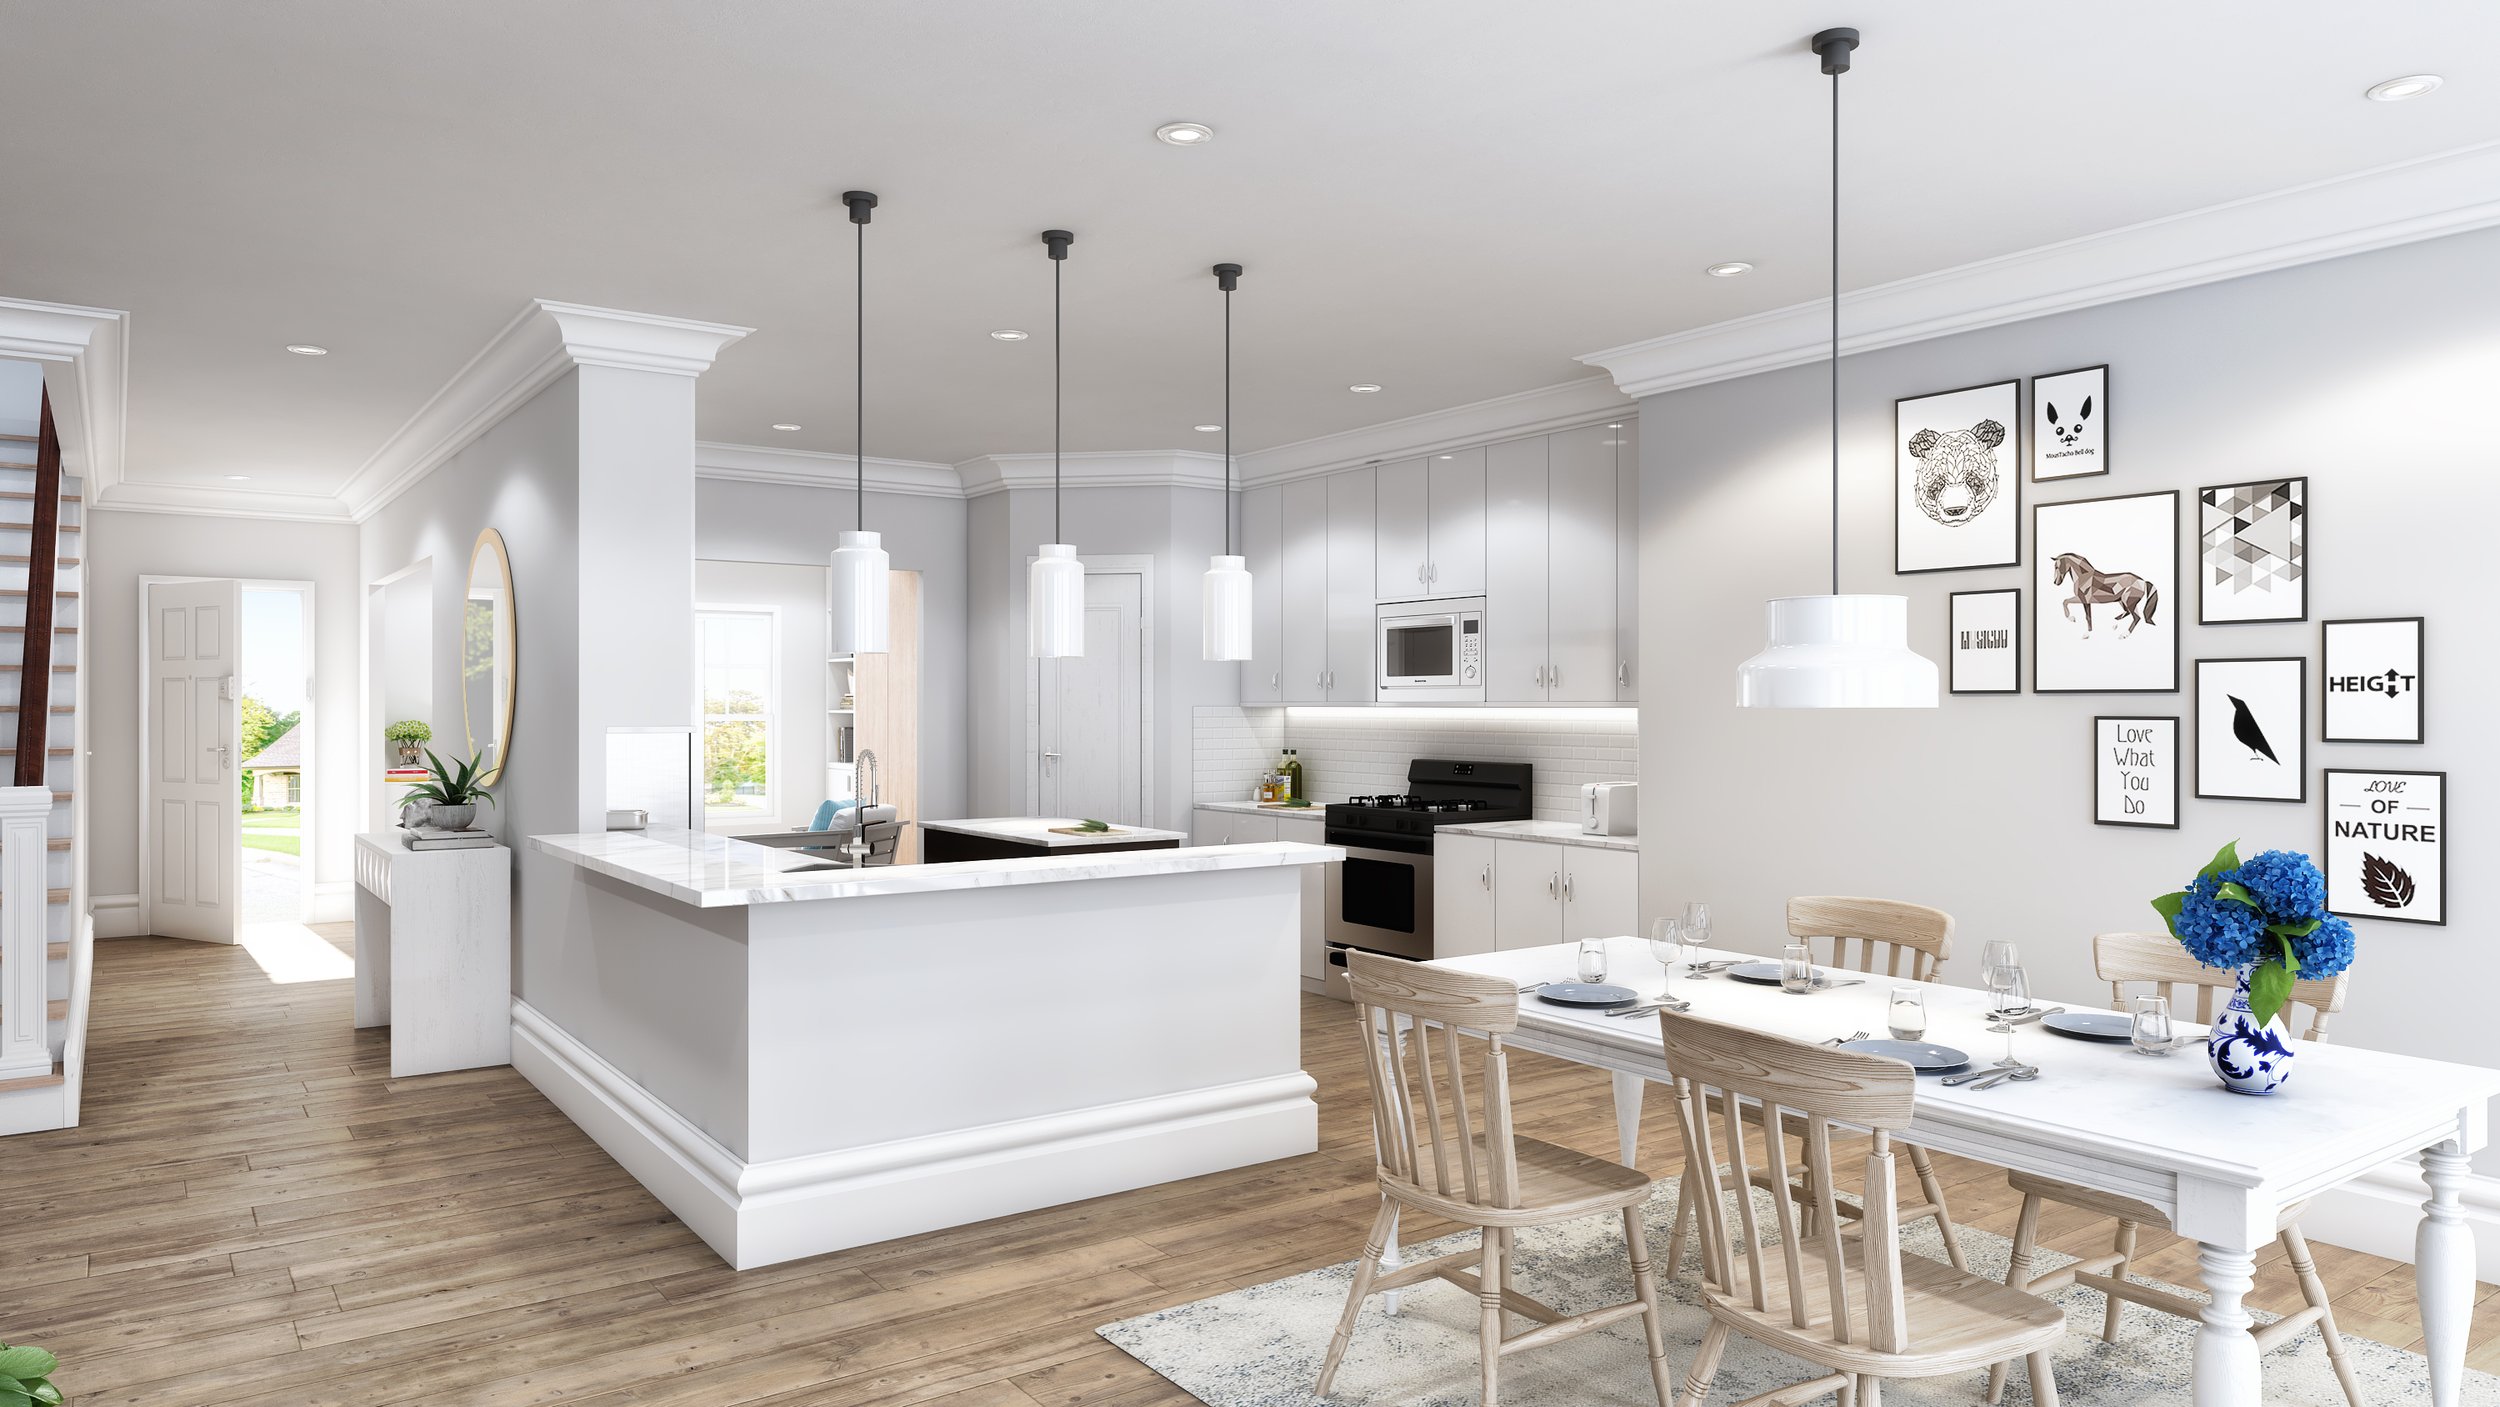
This image is an example of one of our “virtual sets.” It was created using 3D software, and it contains hundreds of options for product placement and scene customization.
As technology changes, it’s becoming increasingly important in the e-commerce and marketing industry to stay up-to-date with the newest tools and techniques. There will always be a demand for product photography, but how studios implement the newest tech and workflows will decide who succeeds and who lags behind.
Here at Elysian, we are constantly reviewing our tools and processes to ensure we are offering our clients a wide range of services, all with competitive prices and fast turnaround times.
Here’s how we are using 3D technology to enhance our product photography offerings:
First, before I tell you about the techniques we are using, it’s important to explain why we use them. Traditionally, lifestyle product photography has been costly, laborious, and time-consuming. For example, photographing furniture required renting a location and staging a house with props and products. Model photography required booking professional models and stylists. And creating interactive 360° spins required extensive photography, retouching, and advanced coding to turn those photos into a spinning asset.
But it’s 2023, and brands are looking for ways to maintain quality, increase their options, and lower costs and timelines. Our founders knew there had to be a way to provide this high-quality lifestyle photography without breaking the bank or requiring a huge team.
We found this answer in 3D tools available, and here are 3 ways we are using them:
1. Virtual Sets
Virtual sets are our pride and joy here at Elysian, by far what we are most excited about. This is our newest service, and it has completely changed the way both we and our clients think about their visual content. But what do we mean when we say “virtual sets?”
We tasked our talented 3D real estate rendering team to create various home-based scenes using computer-generated imagery (CGI). In other words, they created completely virtual, yet photorealistic, rooms. Working closely with our photographers, they ensured that the scenes were jam-packed with dozens of product placement and scene customization opportunities.
The team was successful in achieving the very simple but revolutionary goal: to create extremely flexible environments to place their products into.
Everyone is familiar with compositing (photographing an item and using Photoshop to place it into a stock image), it’s a technique that’s been used for decades. But the main issue with compositing is that you’re stuck with the angle, perspective, lighting, colors, and styling within the stock image options.
With our virtual sets, on the other hand, we unlock the ability to customize any one of those traits and more. Our photographers still shoot the products “for real” in the studio, but while they do so, they are using an interactive low-res representation of the final scene, allowing them to precisely pick the angle, perspective, lighting, and depth of field, all things they would have control over if they were shooting in a real location. An example of one of these interactive scenes is below.
Then, when our editors go to place the photos within the virtual scenes, changing wall colors, textures, scene lighting, or decor is as simple as making just a few clicks, significantly increasing the number of customization options at our disposal.
With this technique, we are simultaneously decreasing the cost of projects, increasing the speed of production, and significantly adding to the flexibility options of lifestyle imagery. Compared to 2D compositing or shooting at a real location, this technique stands out in every way.
Below is an example, from start to finish, or our virtual set technique being used for one of our clients:

1. Photography
The first step is always in-studio photography. Our photography team will shoot your products against a white background, choosing the lighting, angle, and perspective that best suits the scene the client chose to place it in.

2. Product Placement & Scene Customization
Using the low-res, interactive preview of the chosen scene, we will line up the perspective using the photographs, adjust the lighting and depth of field, and change colors and decor to your liking.

3. Final Render
Finally, we place your product into the scene, use compositing techniques to incorporate it better, and process the high-res render.
2. Product rendering, animation, & interaction
In addition to our virtual sets and staging that I discussed above, we also use more traditional rendering techniques to provide our clients with both static and animated rendered assets. While this isn’t necessarily anything new, you typically only see rendering studios offering these services, and you don’t often see photo studios using these techniques to enhance their production.
But despite being primarily a photography studio, we are more than comfortable identifying instances in which rendering may be a more efficient solution for our clients, cutting the photography process entirely. Using the same 3D technology, we use rendering to create product photos, product animations, and interactive spins.
1. Product Photos
Sometimes traditional photography may not be the best option for a company. Maybe they are in early development and only have delicate prototypes. Maybe the product is far too large to transport and photograph. Maybe they’re just too expensive to risk creative production. In these cases, we recommend rendering the product in 3D
By collecting the CAD files from the client or manufacturer, we can generate a model of the product in very little time. Then, if we are fortunate enough to have reference images of the item, we will generate complex textures and colors that bring the product to life.

2. Product Animations
Sometimes a client’s needs require things that photography cannot achieve. For example, what if a client wants to demonstrate a medical device being used in surgery? Or what if they want to show the inner components of a complex industrial machine for safety training? In cases such as these, again, rendering is the way to go.
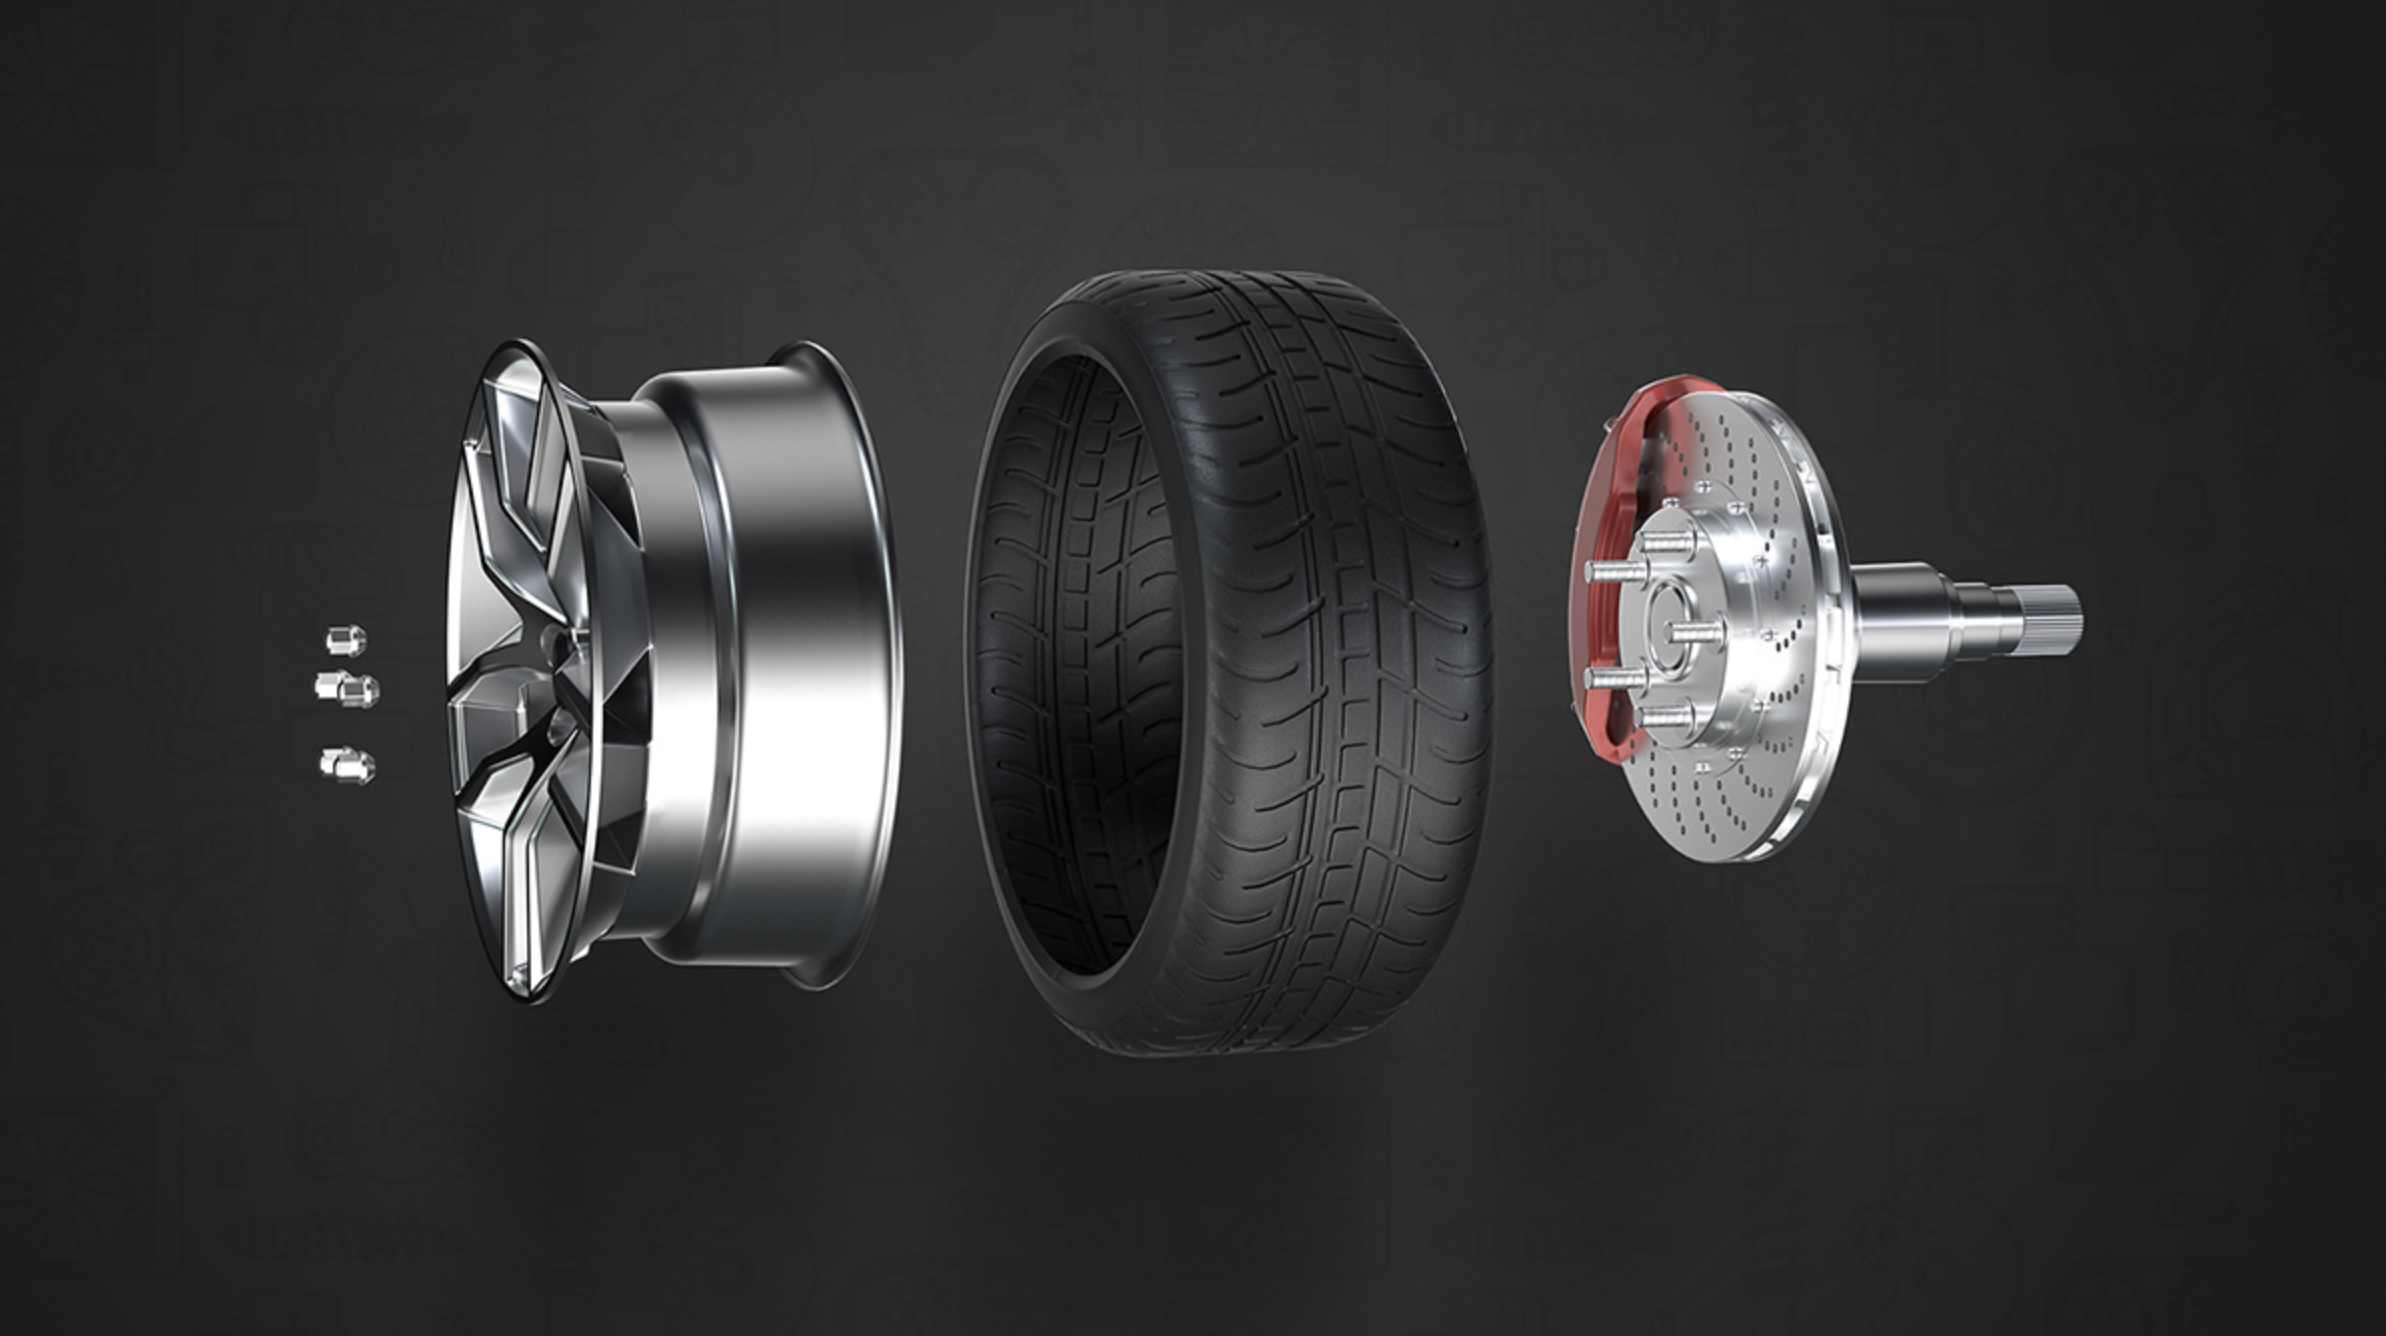
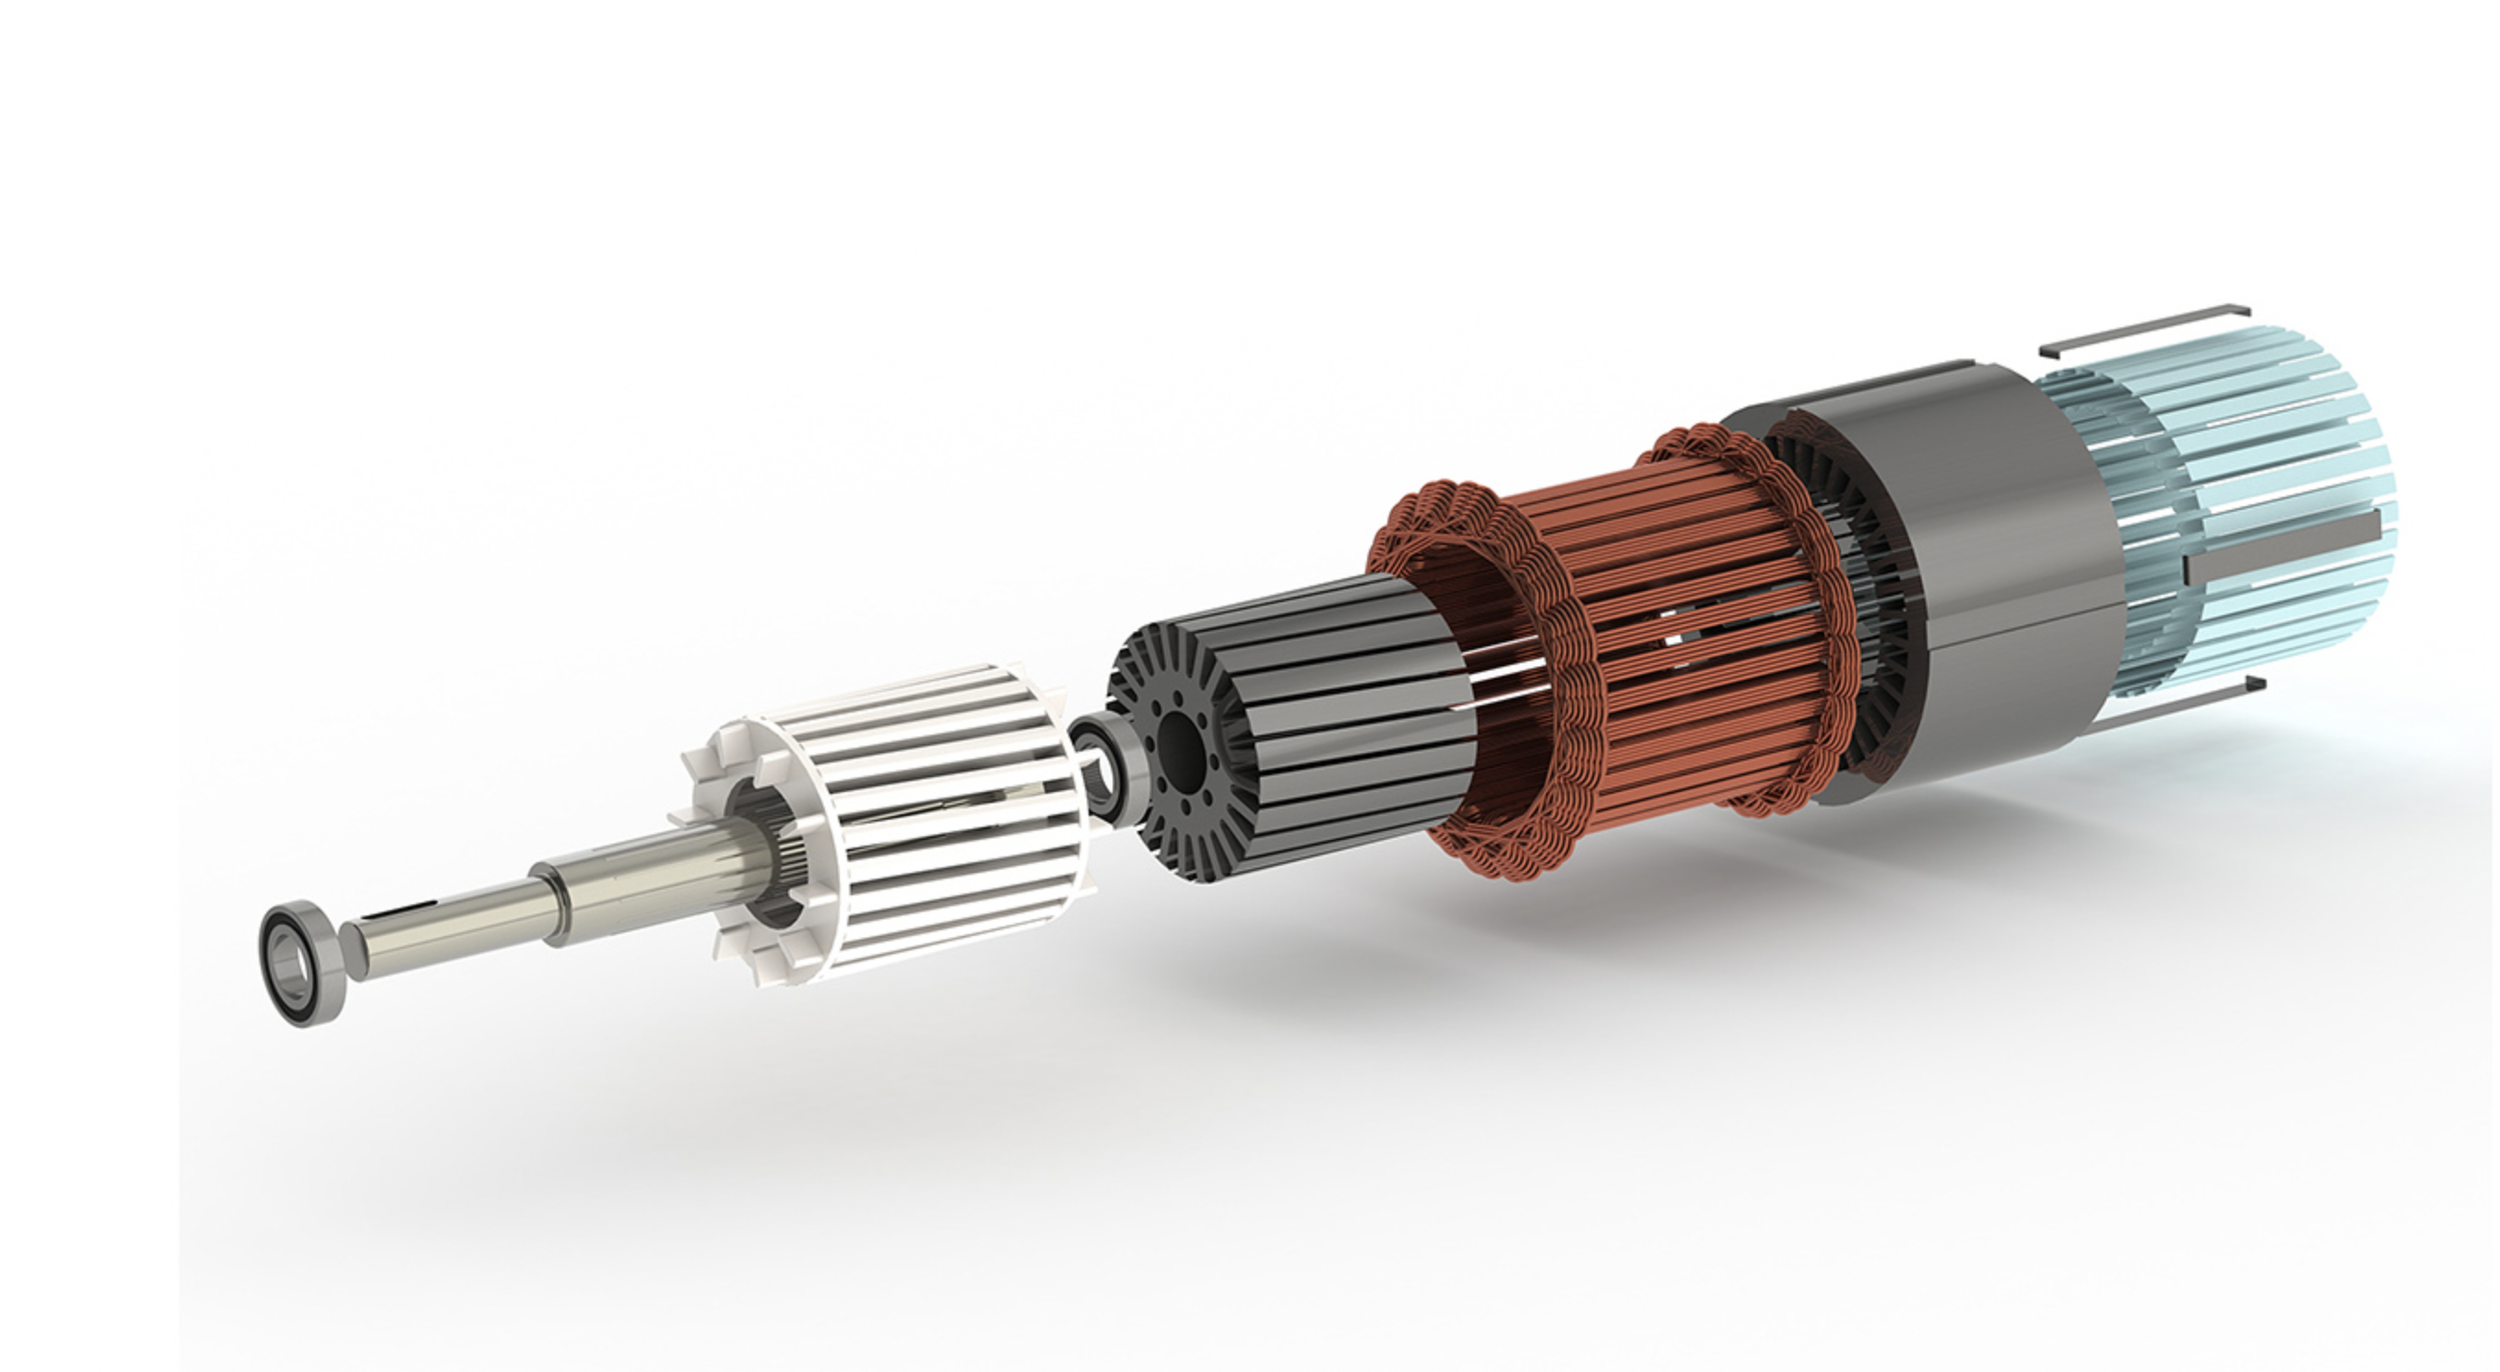
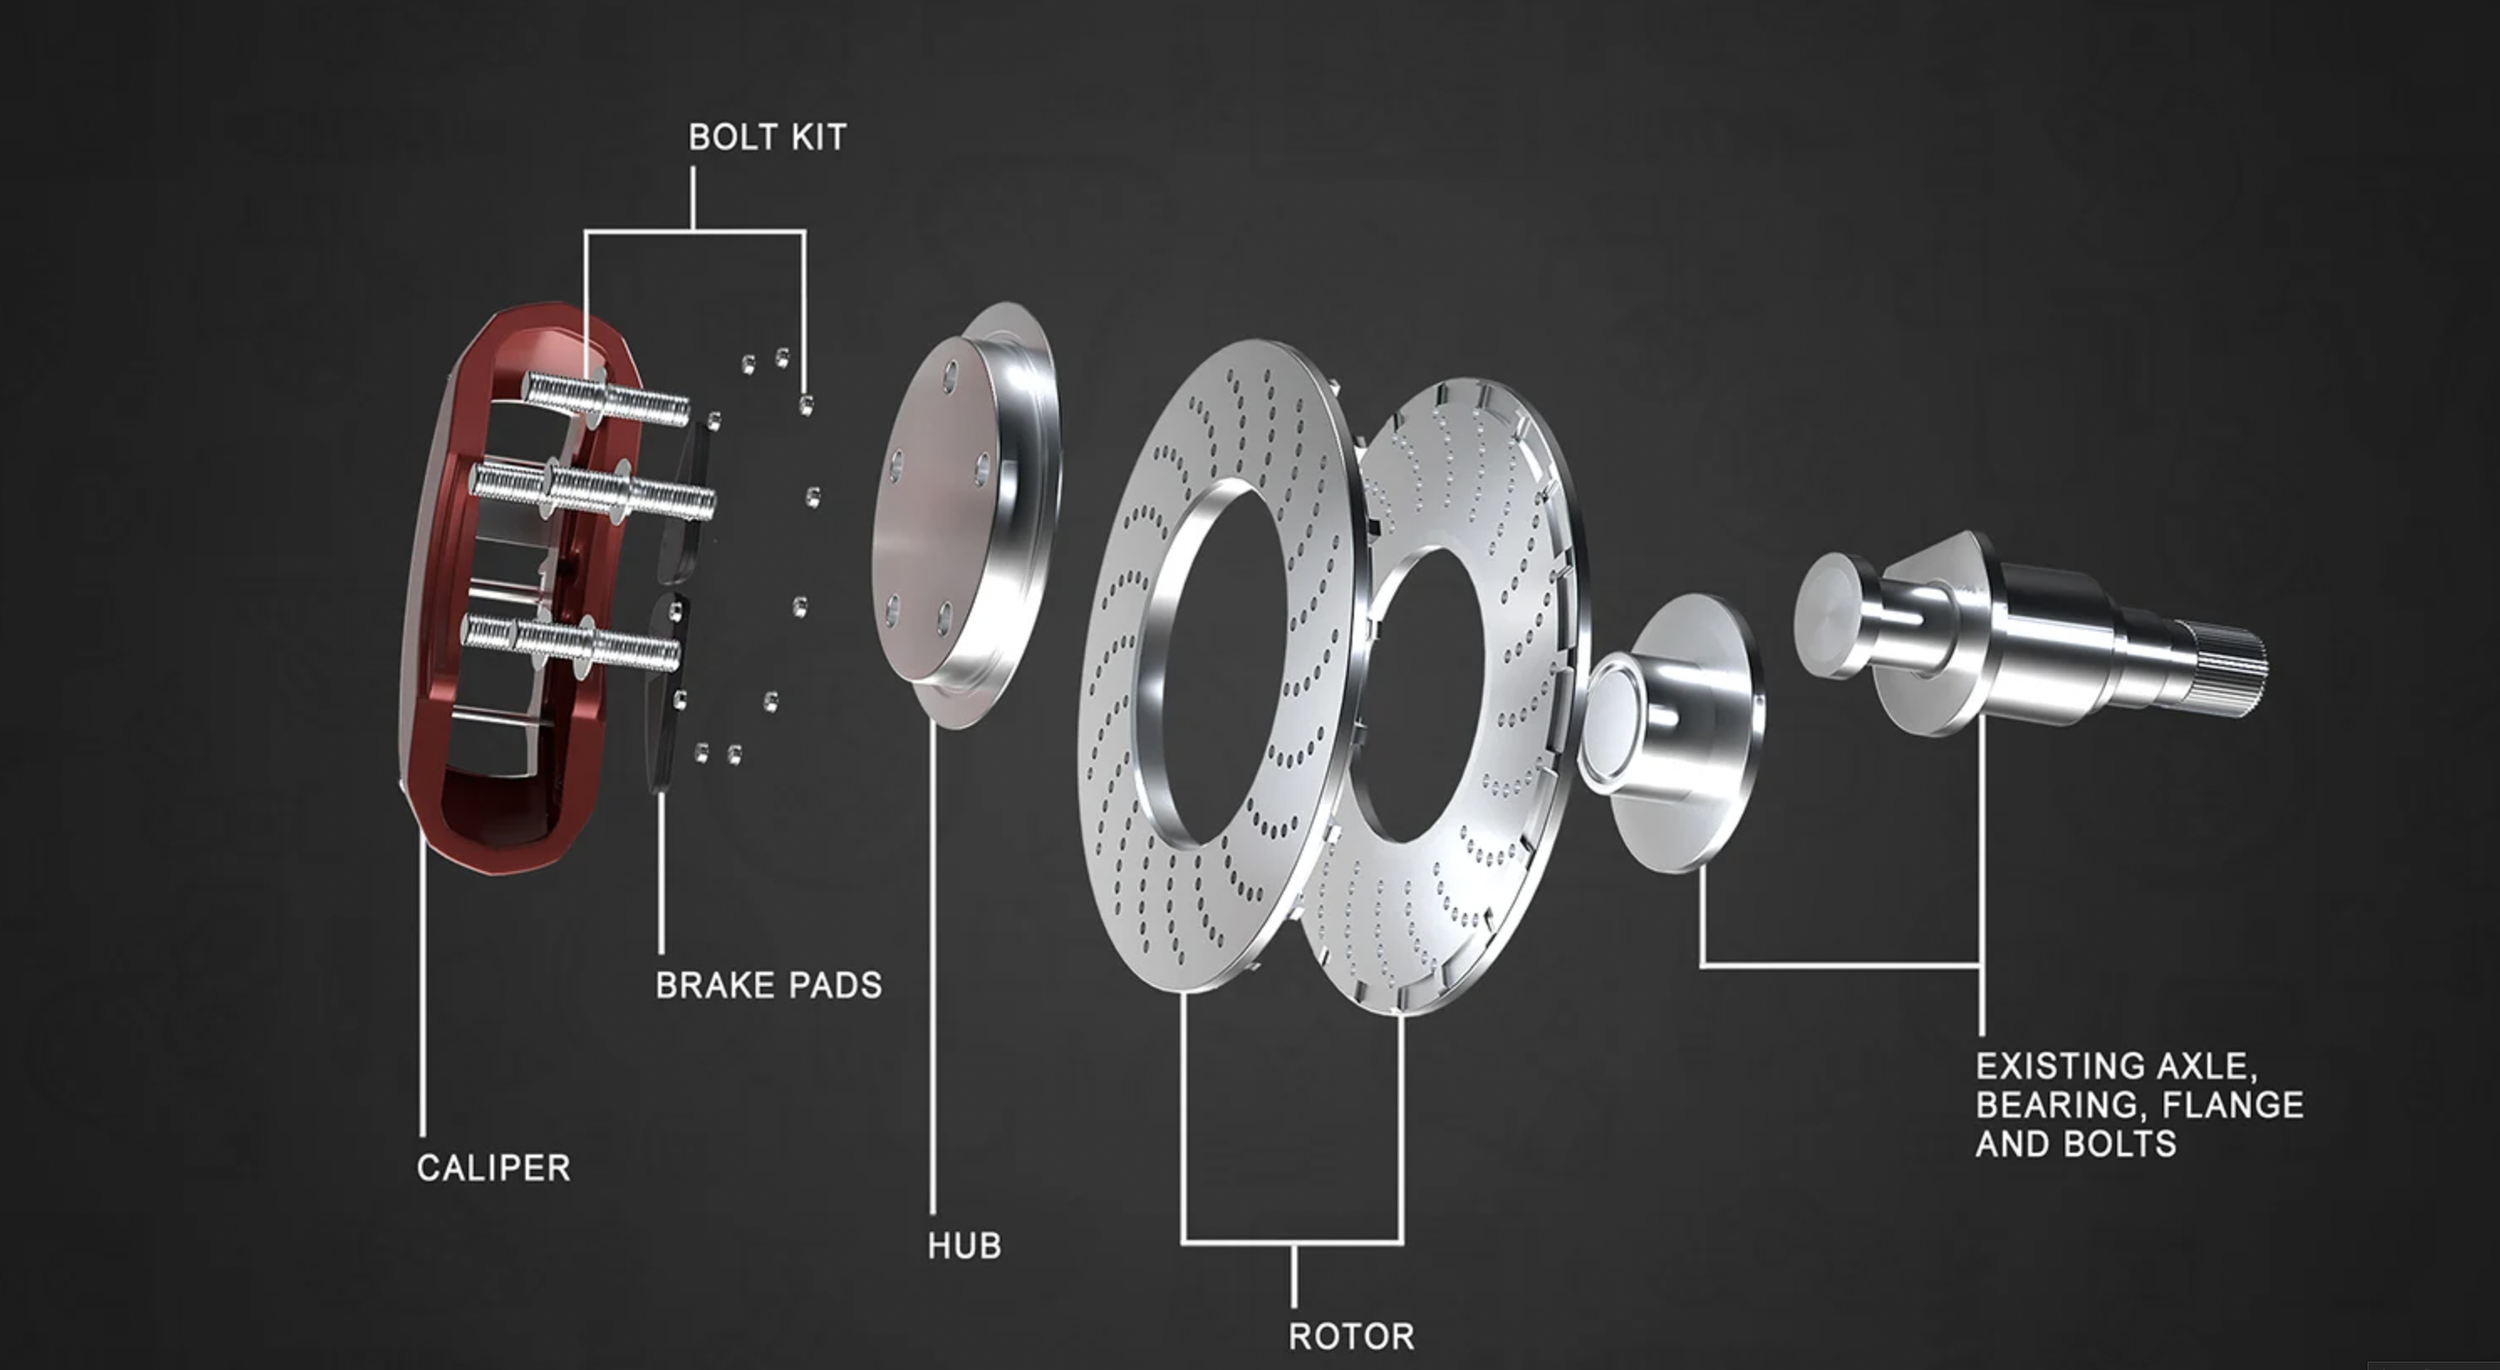
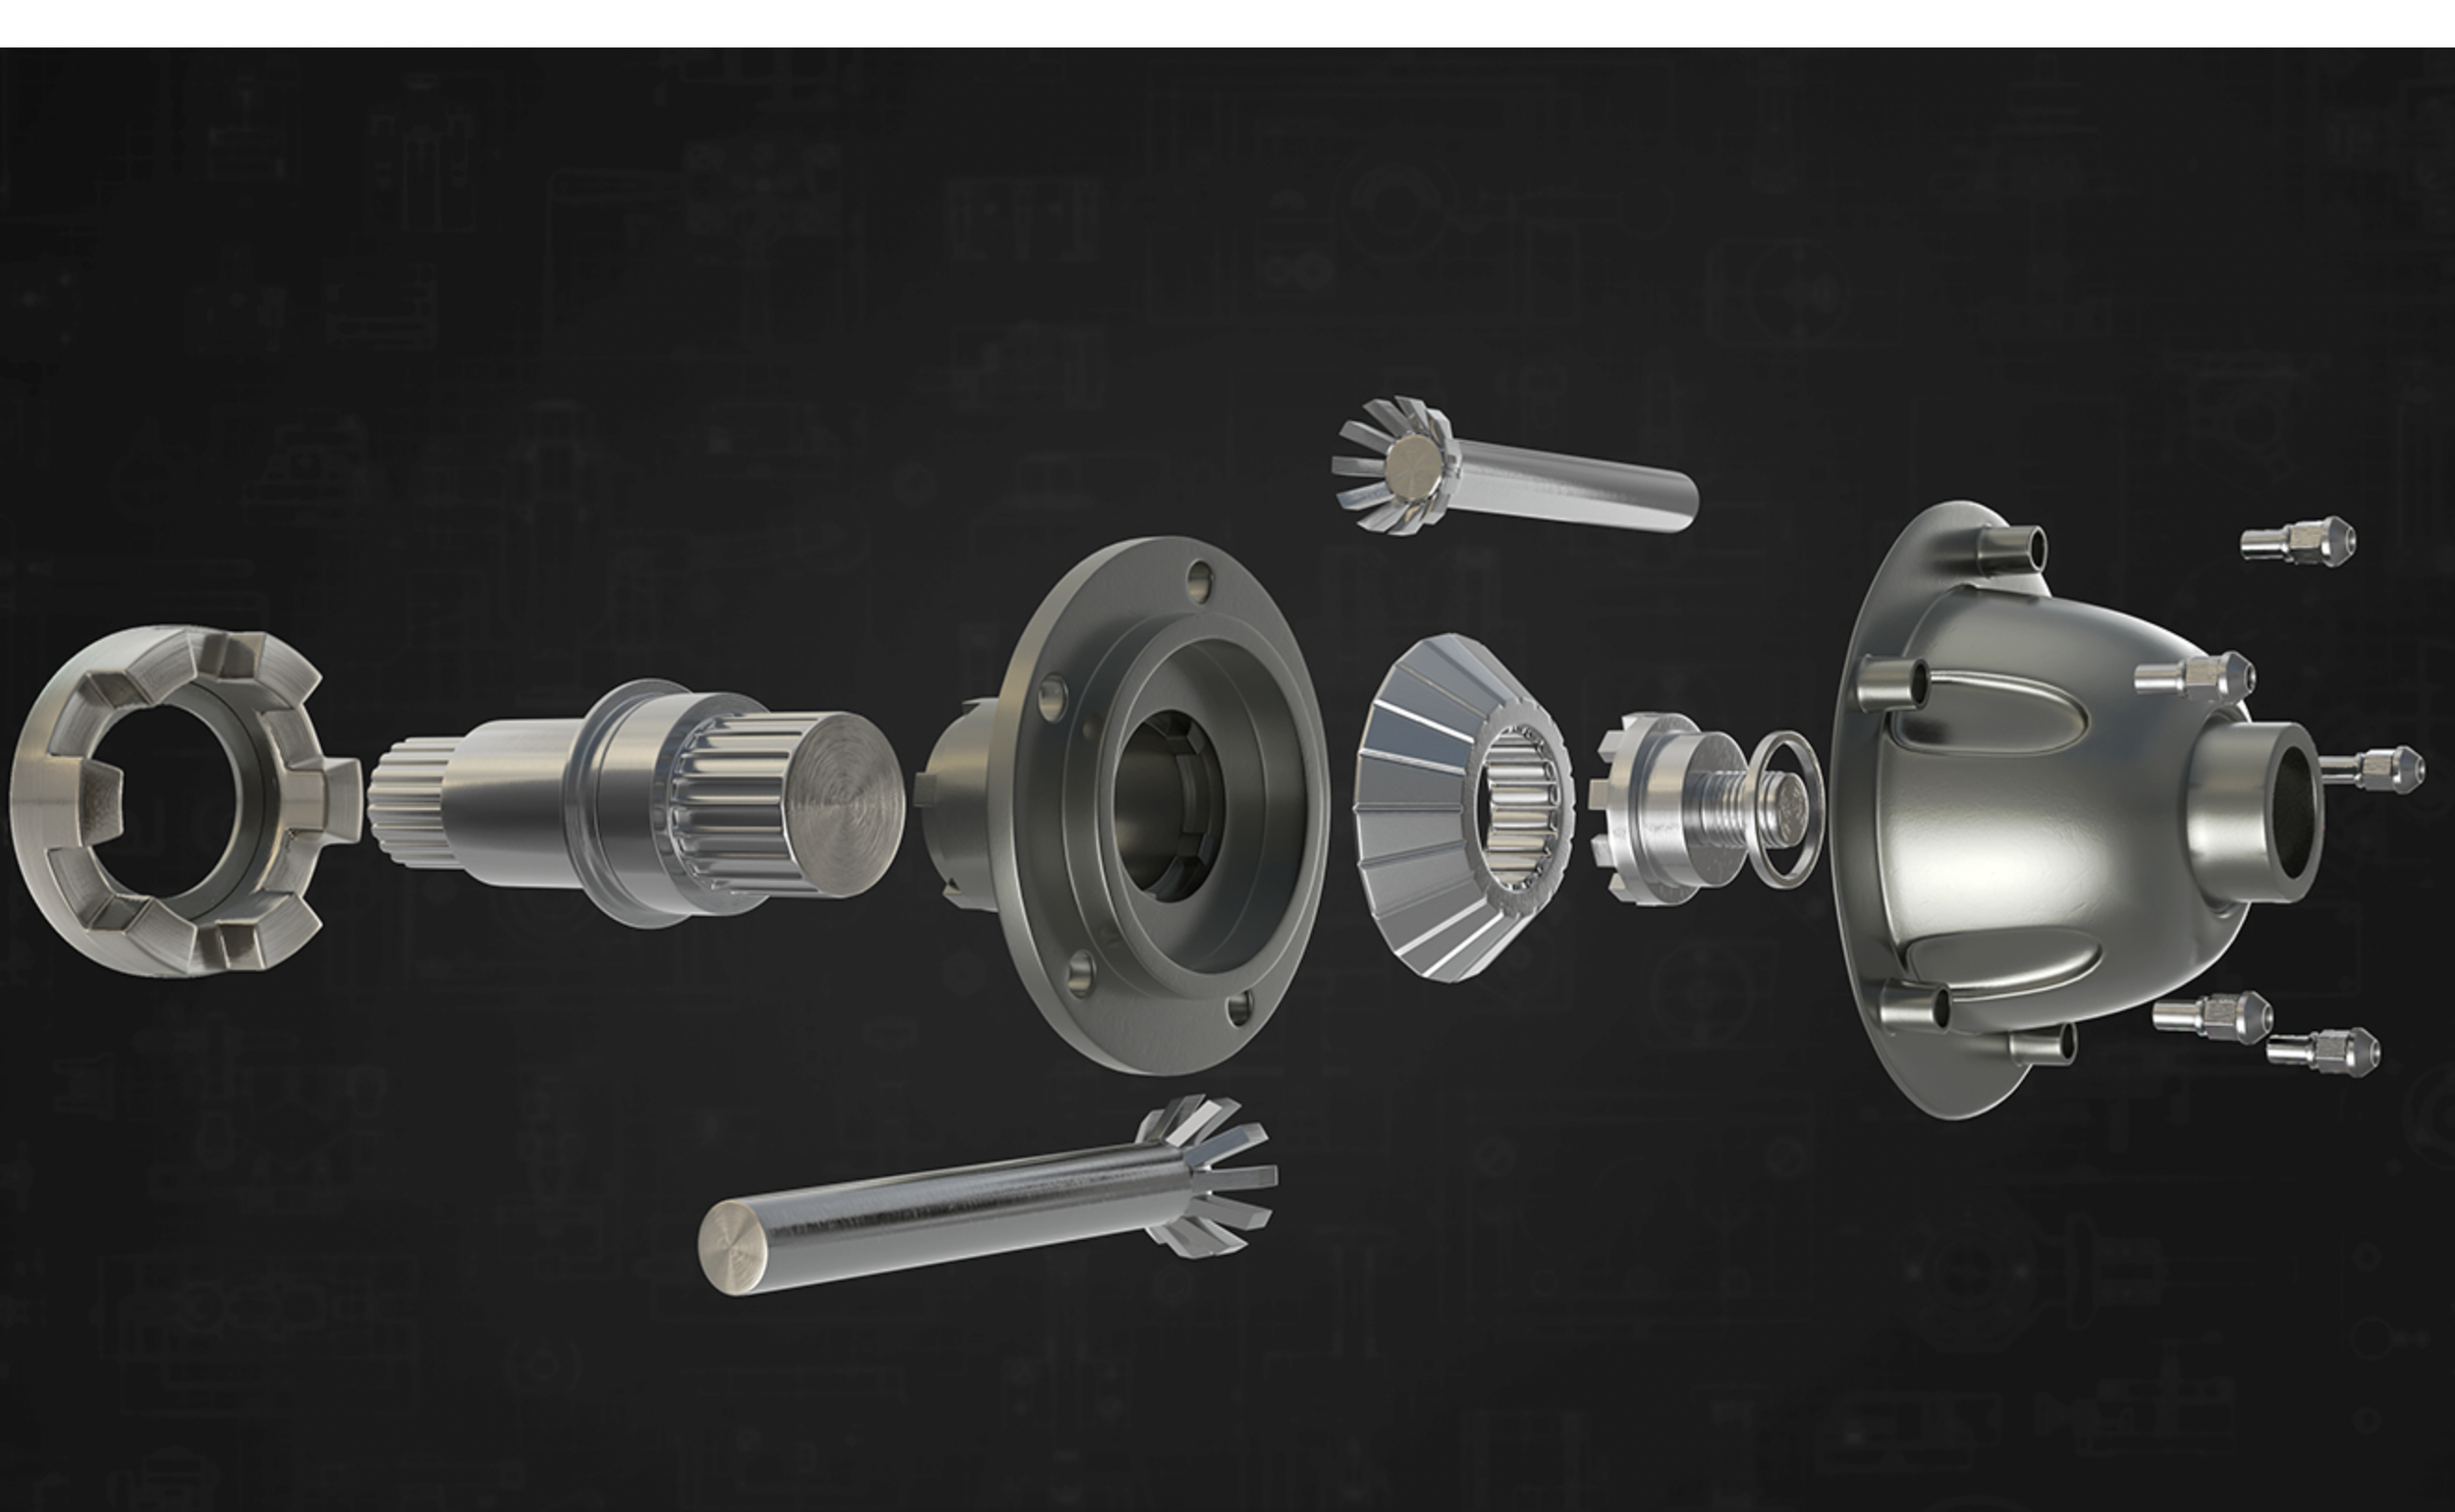
The latter example above is a request we often receive, and it’s so common that we have a name for it: “Exploded Views.” This is when the client wants to simultaneously view not only the product as a whole, but also the numerous parts and components within. This technique can result in a captivating website header, or it can be animated to be used as an interactive training manual.
Below are static versions of “exploded views,” but you can imagine the endless possibilities when it comes to animating assets such as these in video format. Even father below those is an example of using video motion, music, and text to add to a product render.

3. Interactive Spins
Once the 3D models have been created for a product, it becomes fairly simple to generate interactive spins. These are my personal favorite, as they truly are the closest thing to being able to hold the product in your hands.
Virtually any product or brand can benefit from interactive 360 spins. Most of the spins we create are done with traditional photography, but for certain products, CGI makes it easier and more affordable. For example, products that are particularly difficult to light or hold in place as they spin typically are easier to create using 3D.
Below are a couple of examples of interactive spins. Please, give them a click, drag, and zoom! They’re pretty fun to play around with.
This first example of a watch was chosen to be created in 3D for 3 reasons. First of all, watches are one of the most difficult items to light with studio flashes. Additionally, there’s no way to hold the watch in that form as it spins on a turntable. And finally, this client desired a more “high-end,” professional representation of their products, similar to Apple, so rendering was the logical choice.
This second example is a very small medical device used in brain surgery. Due to its extremely small size, reflective nature, and inability to stand on its own as it rotated on a turntable, it was decided that it would be created using rendering instead of photography.
3. 2D & 3D Compositing
The final and most common way we utilize 3D tools is with simple compositing. As we discussed earlier, compositing is when we take photos of products and use Photoshop to place them into stock images. Instead of using rendering tools, however, we can simply use the 3D tools within older software like Photoshop to achieve captivating results.
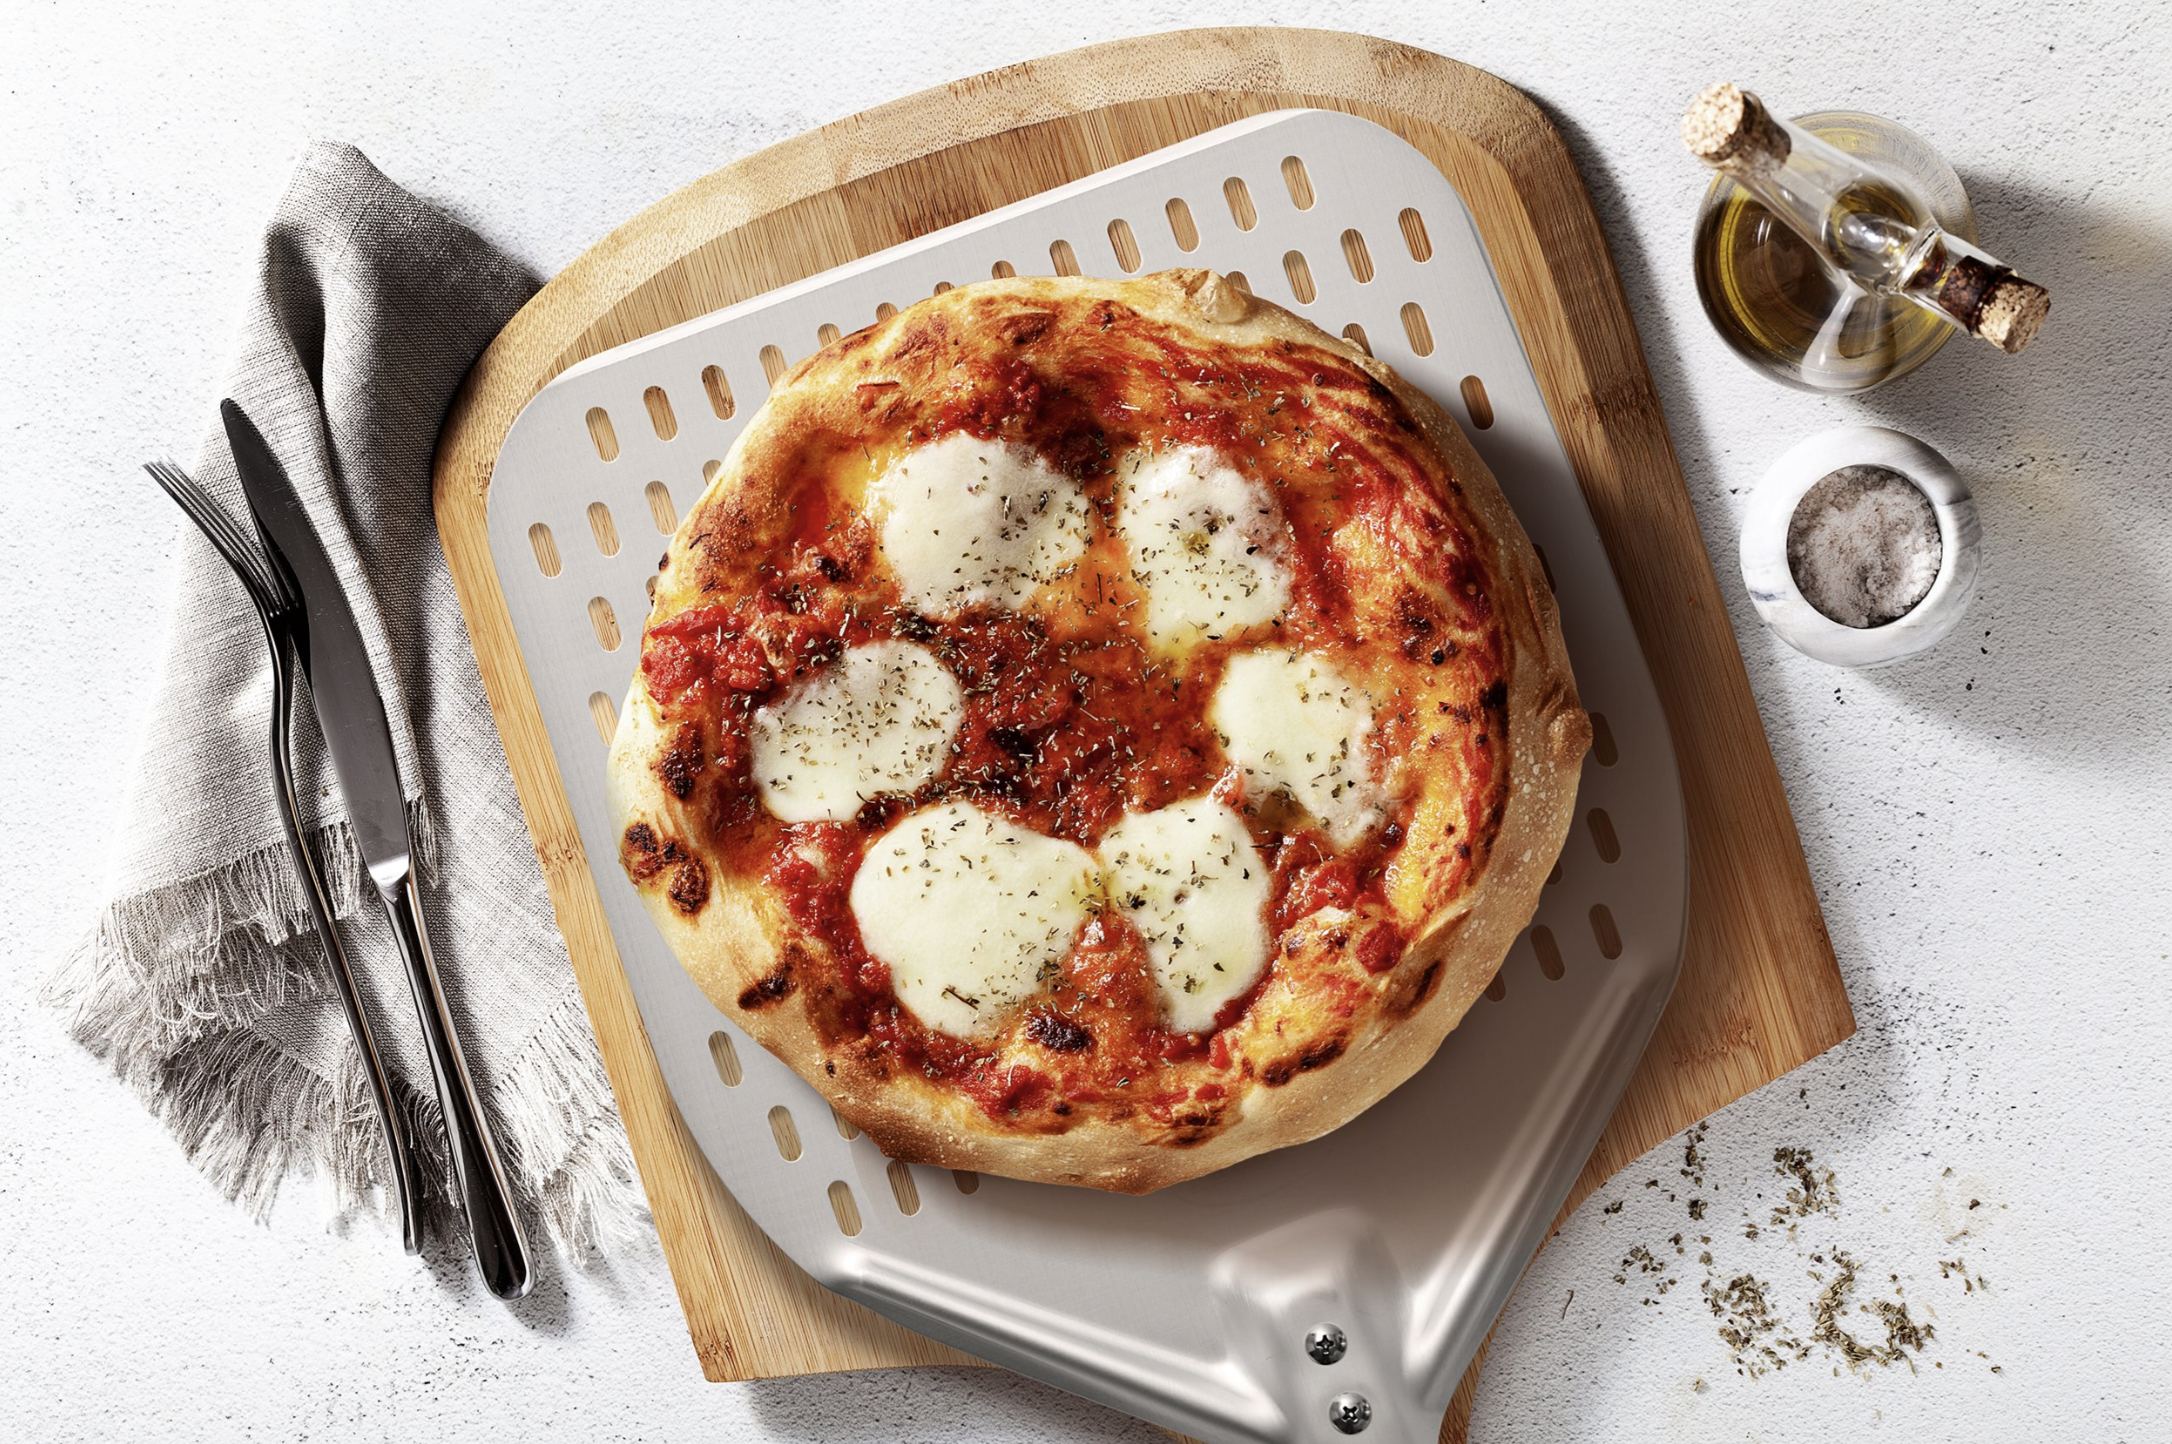
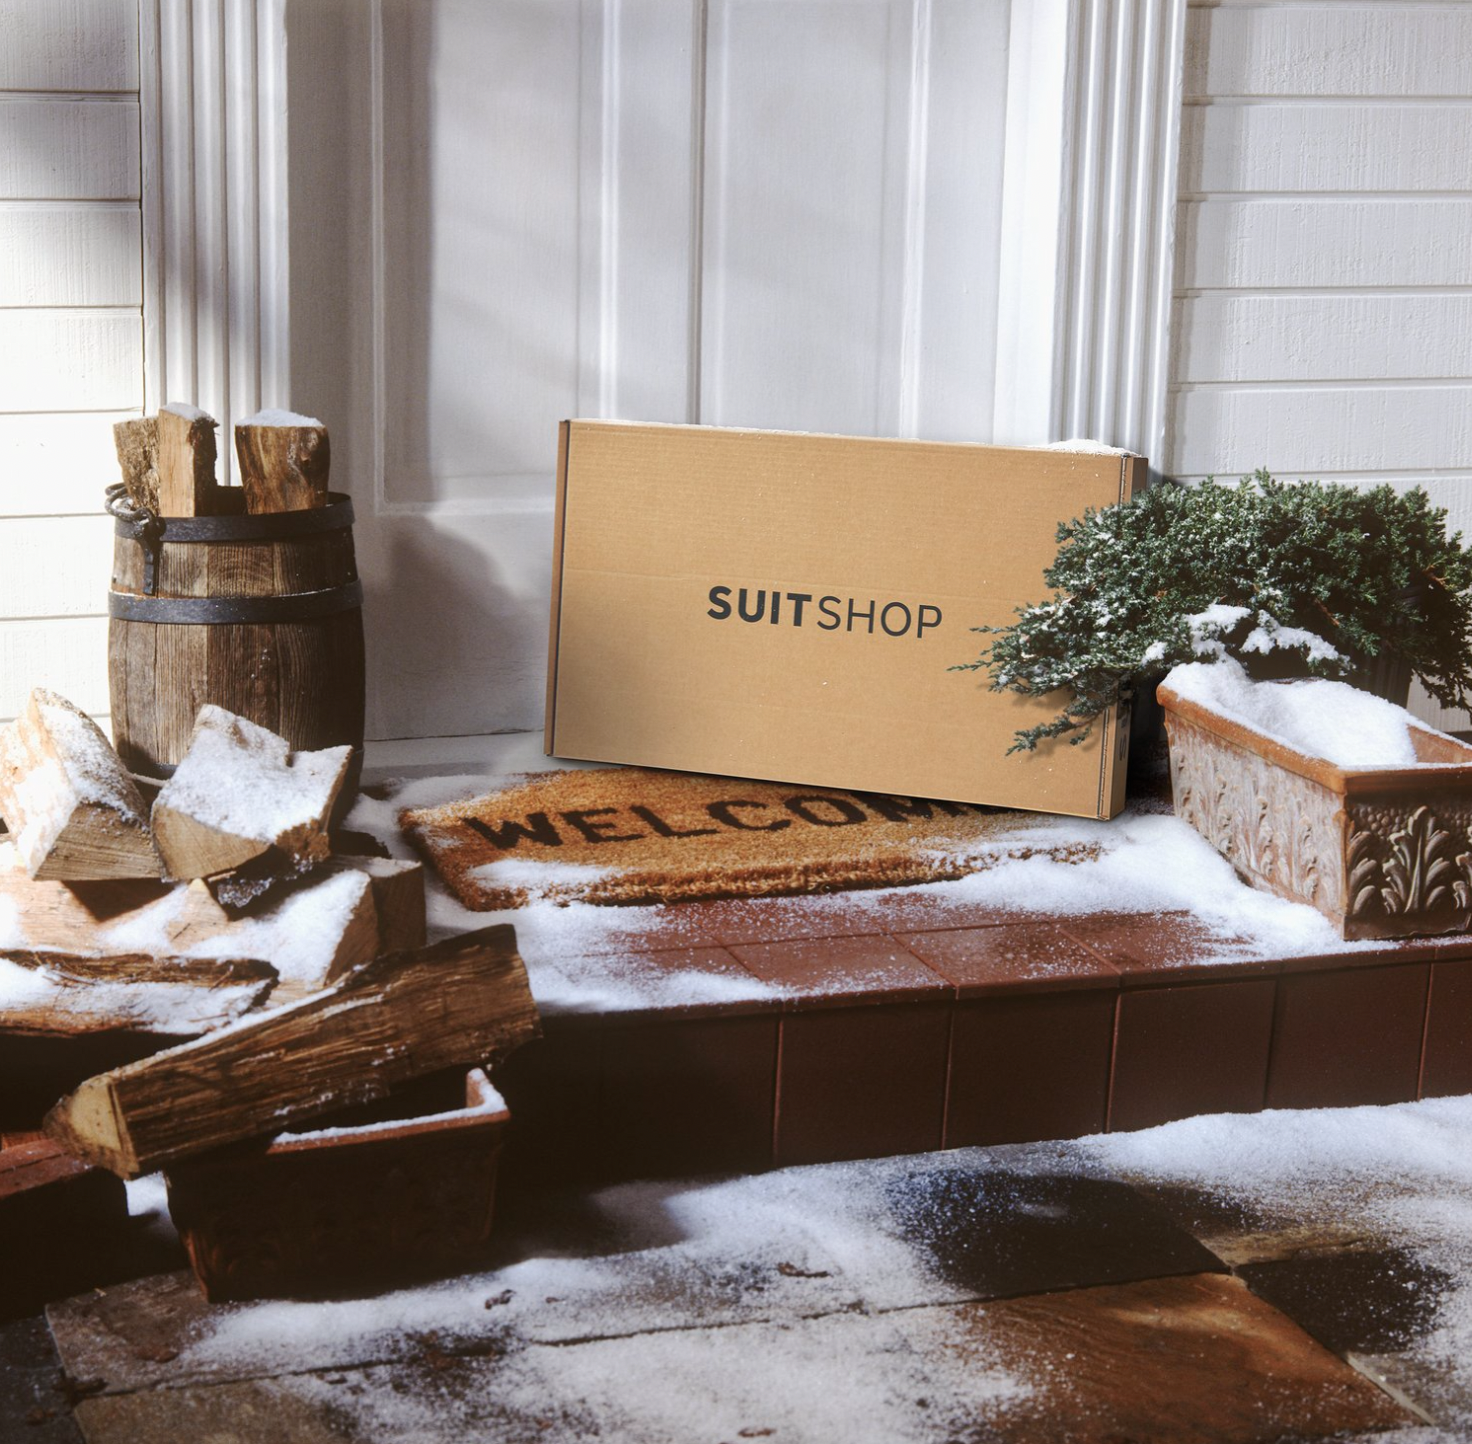
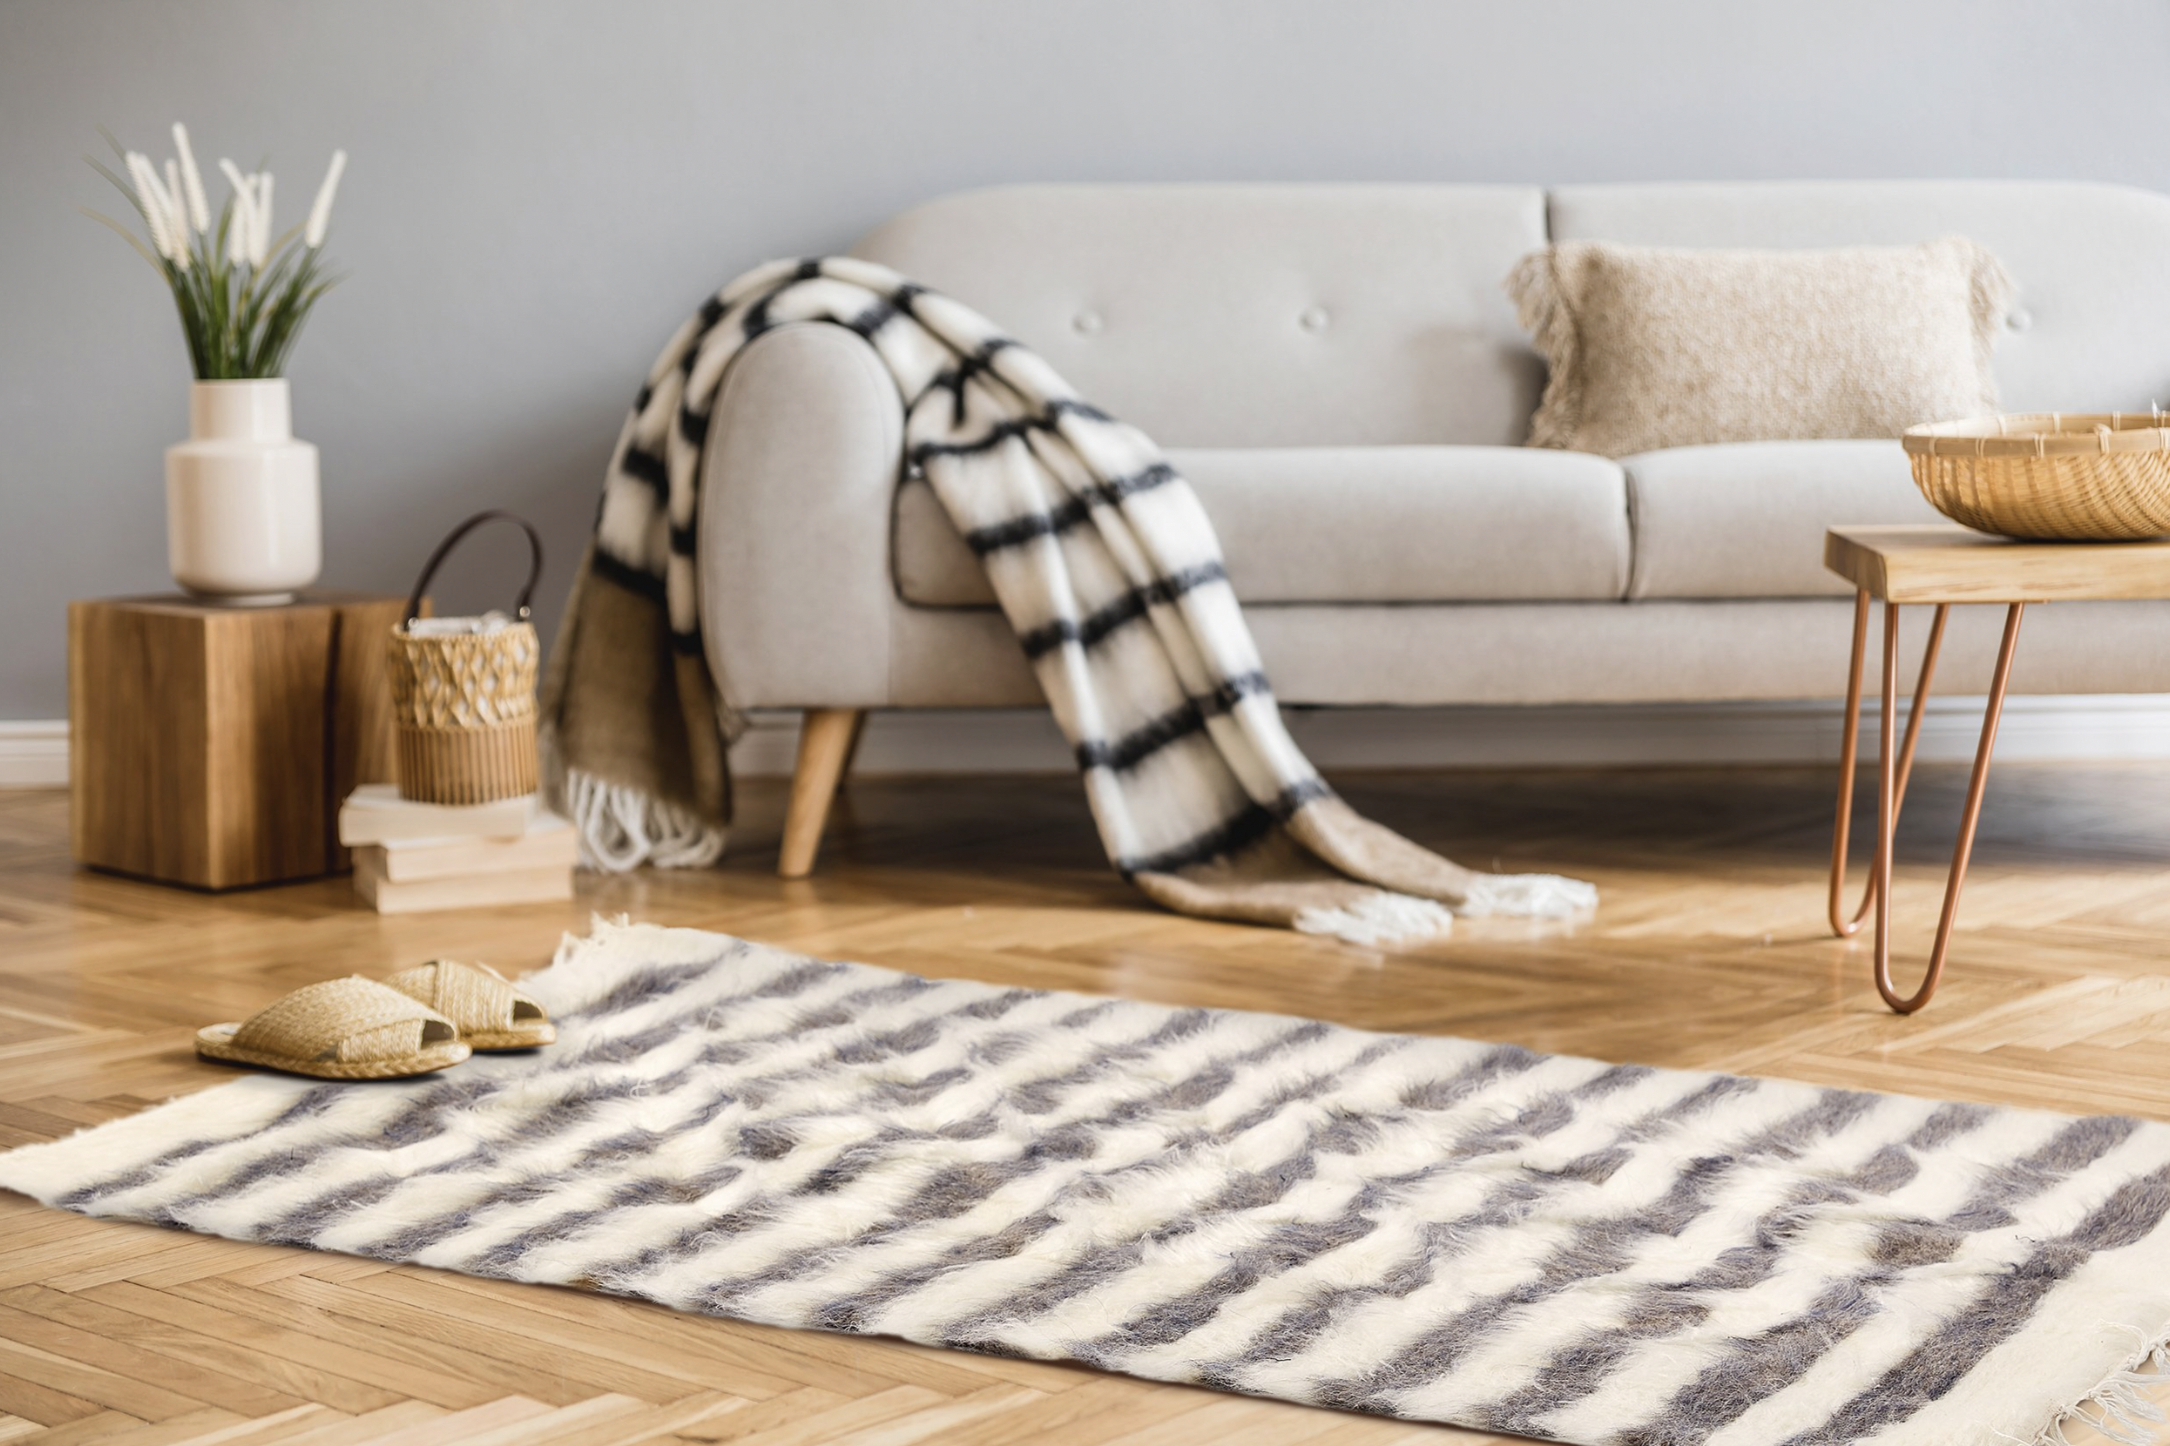
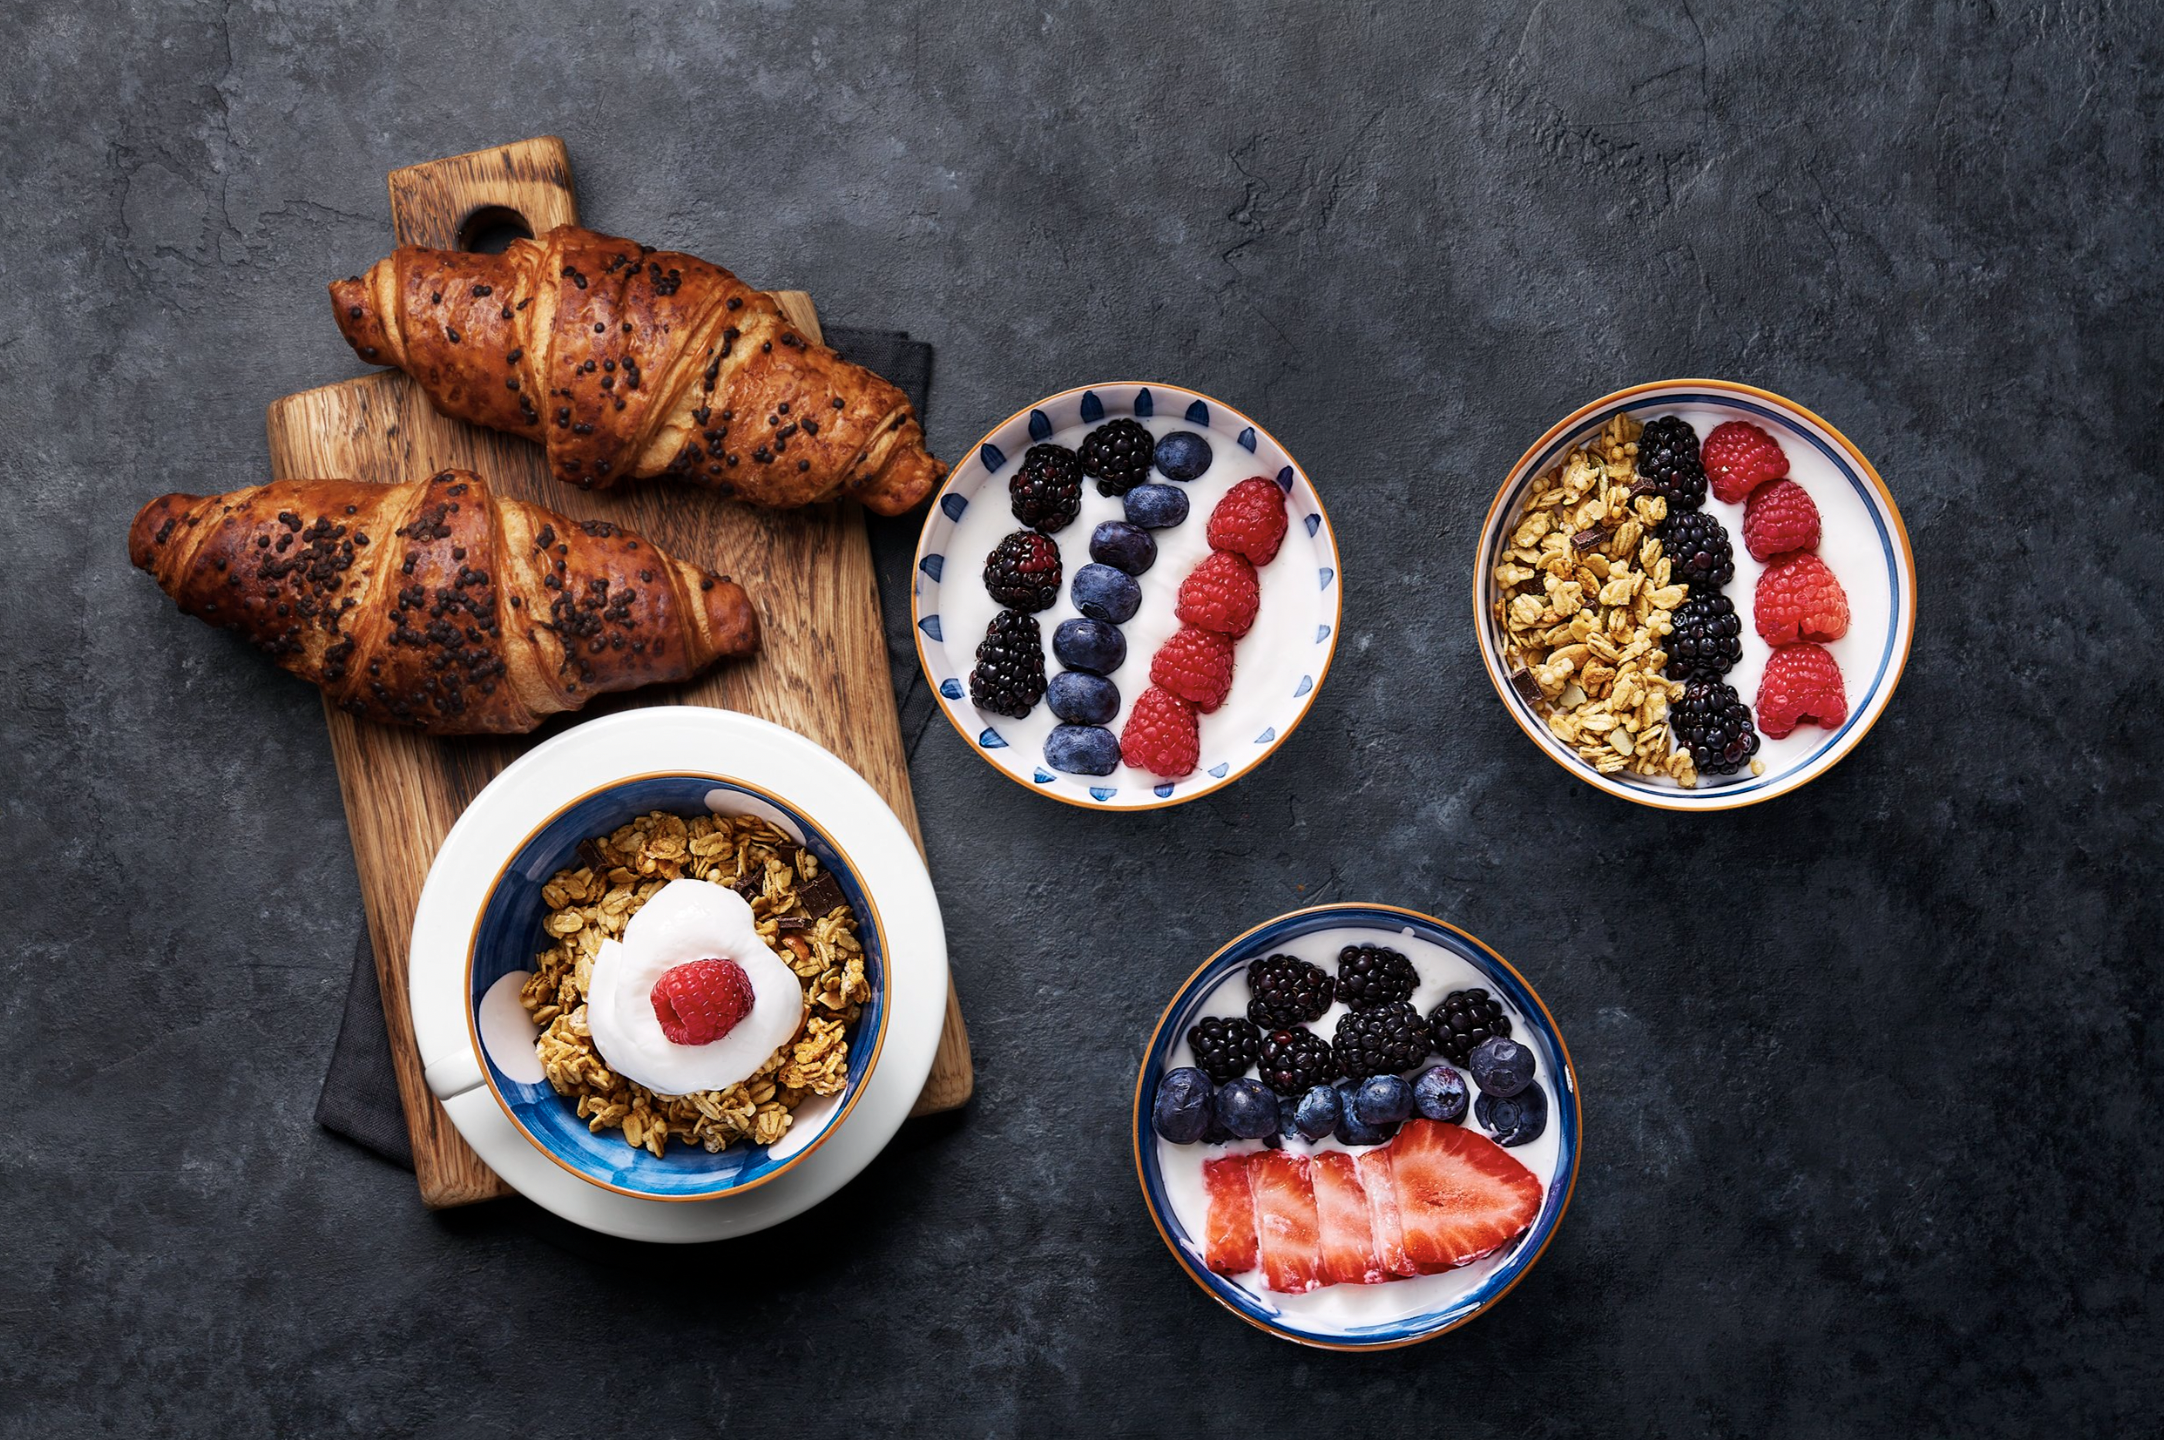
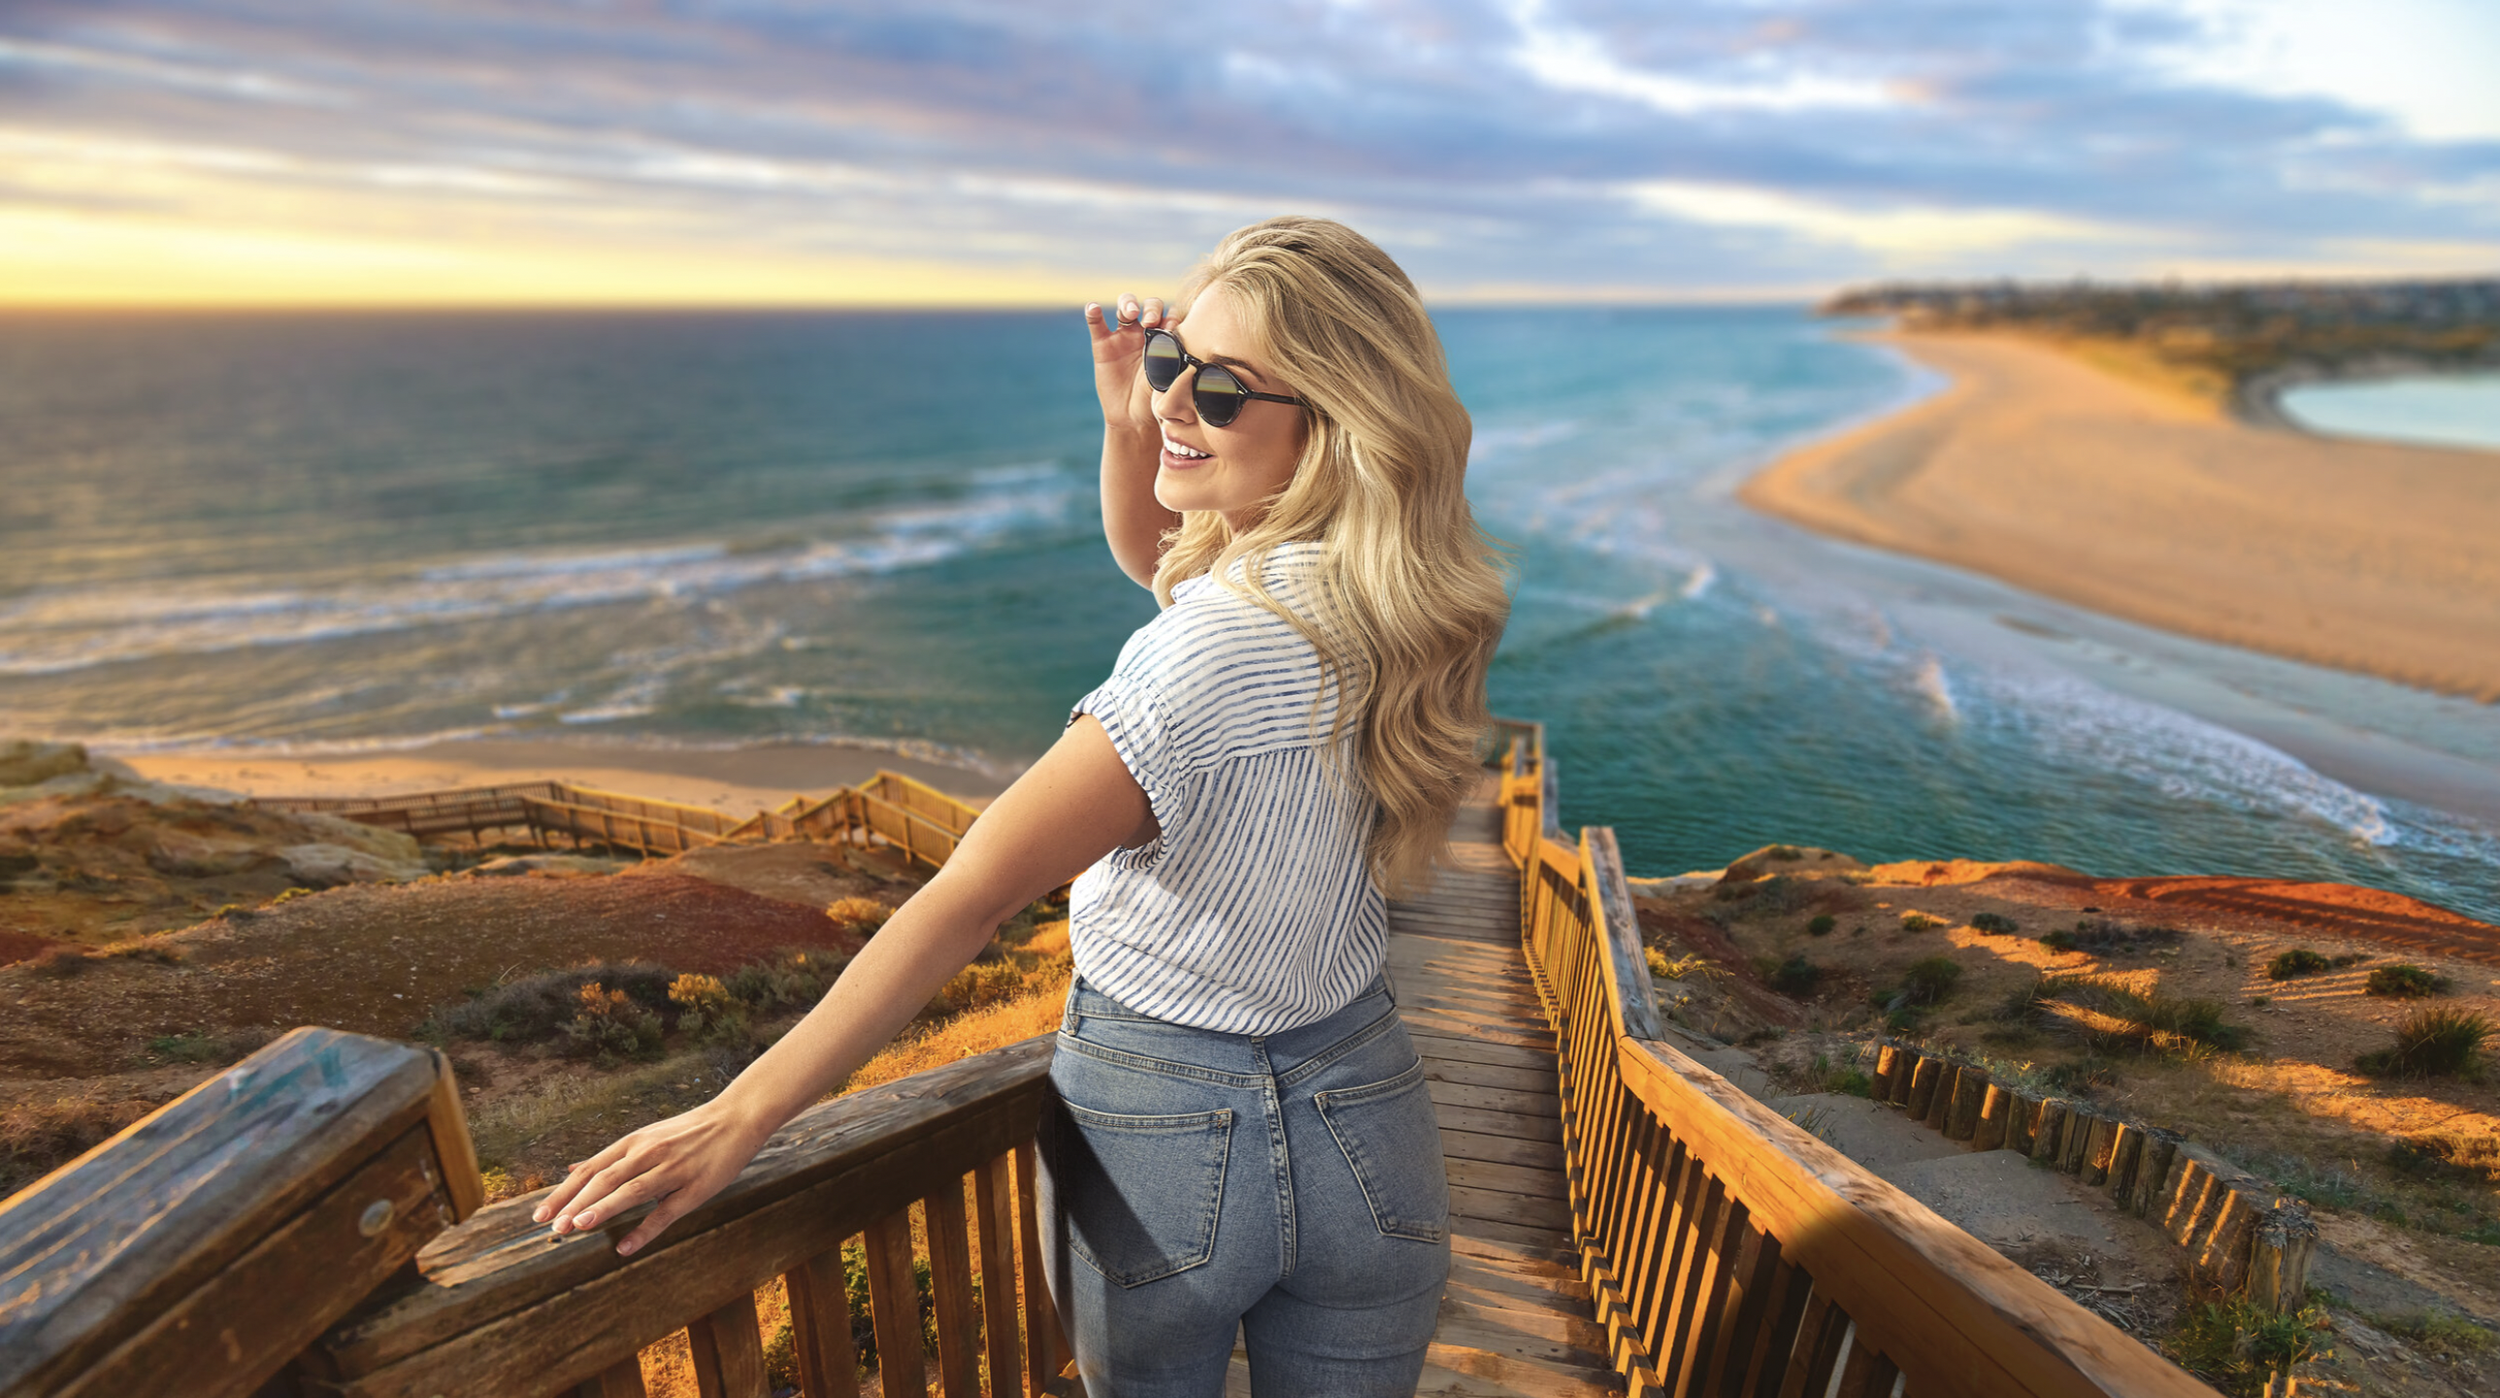
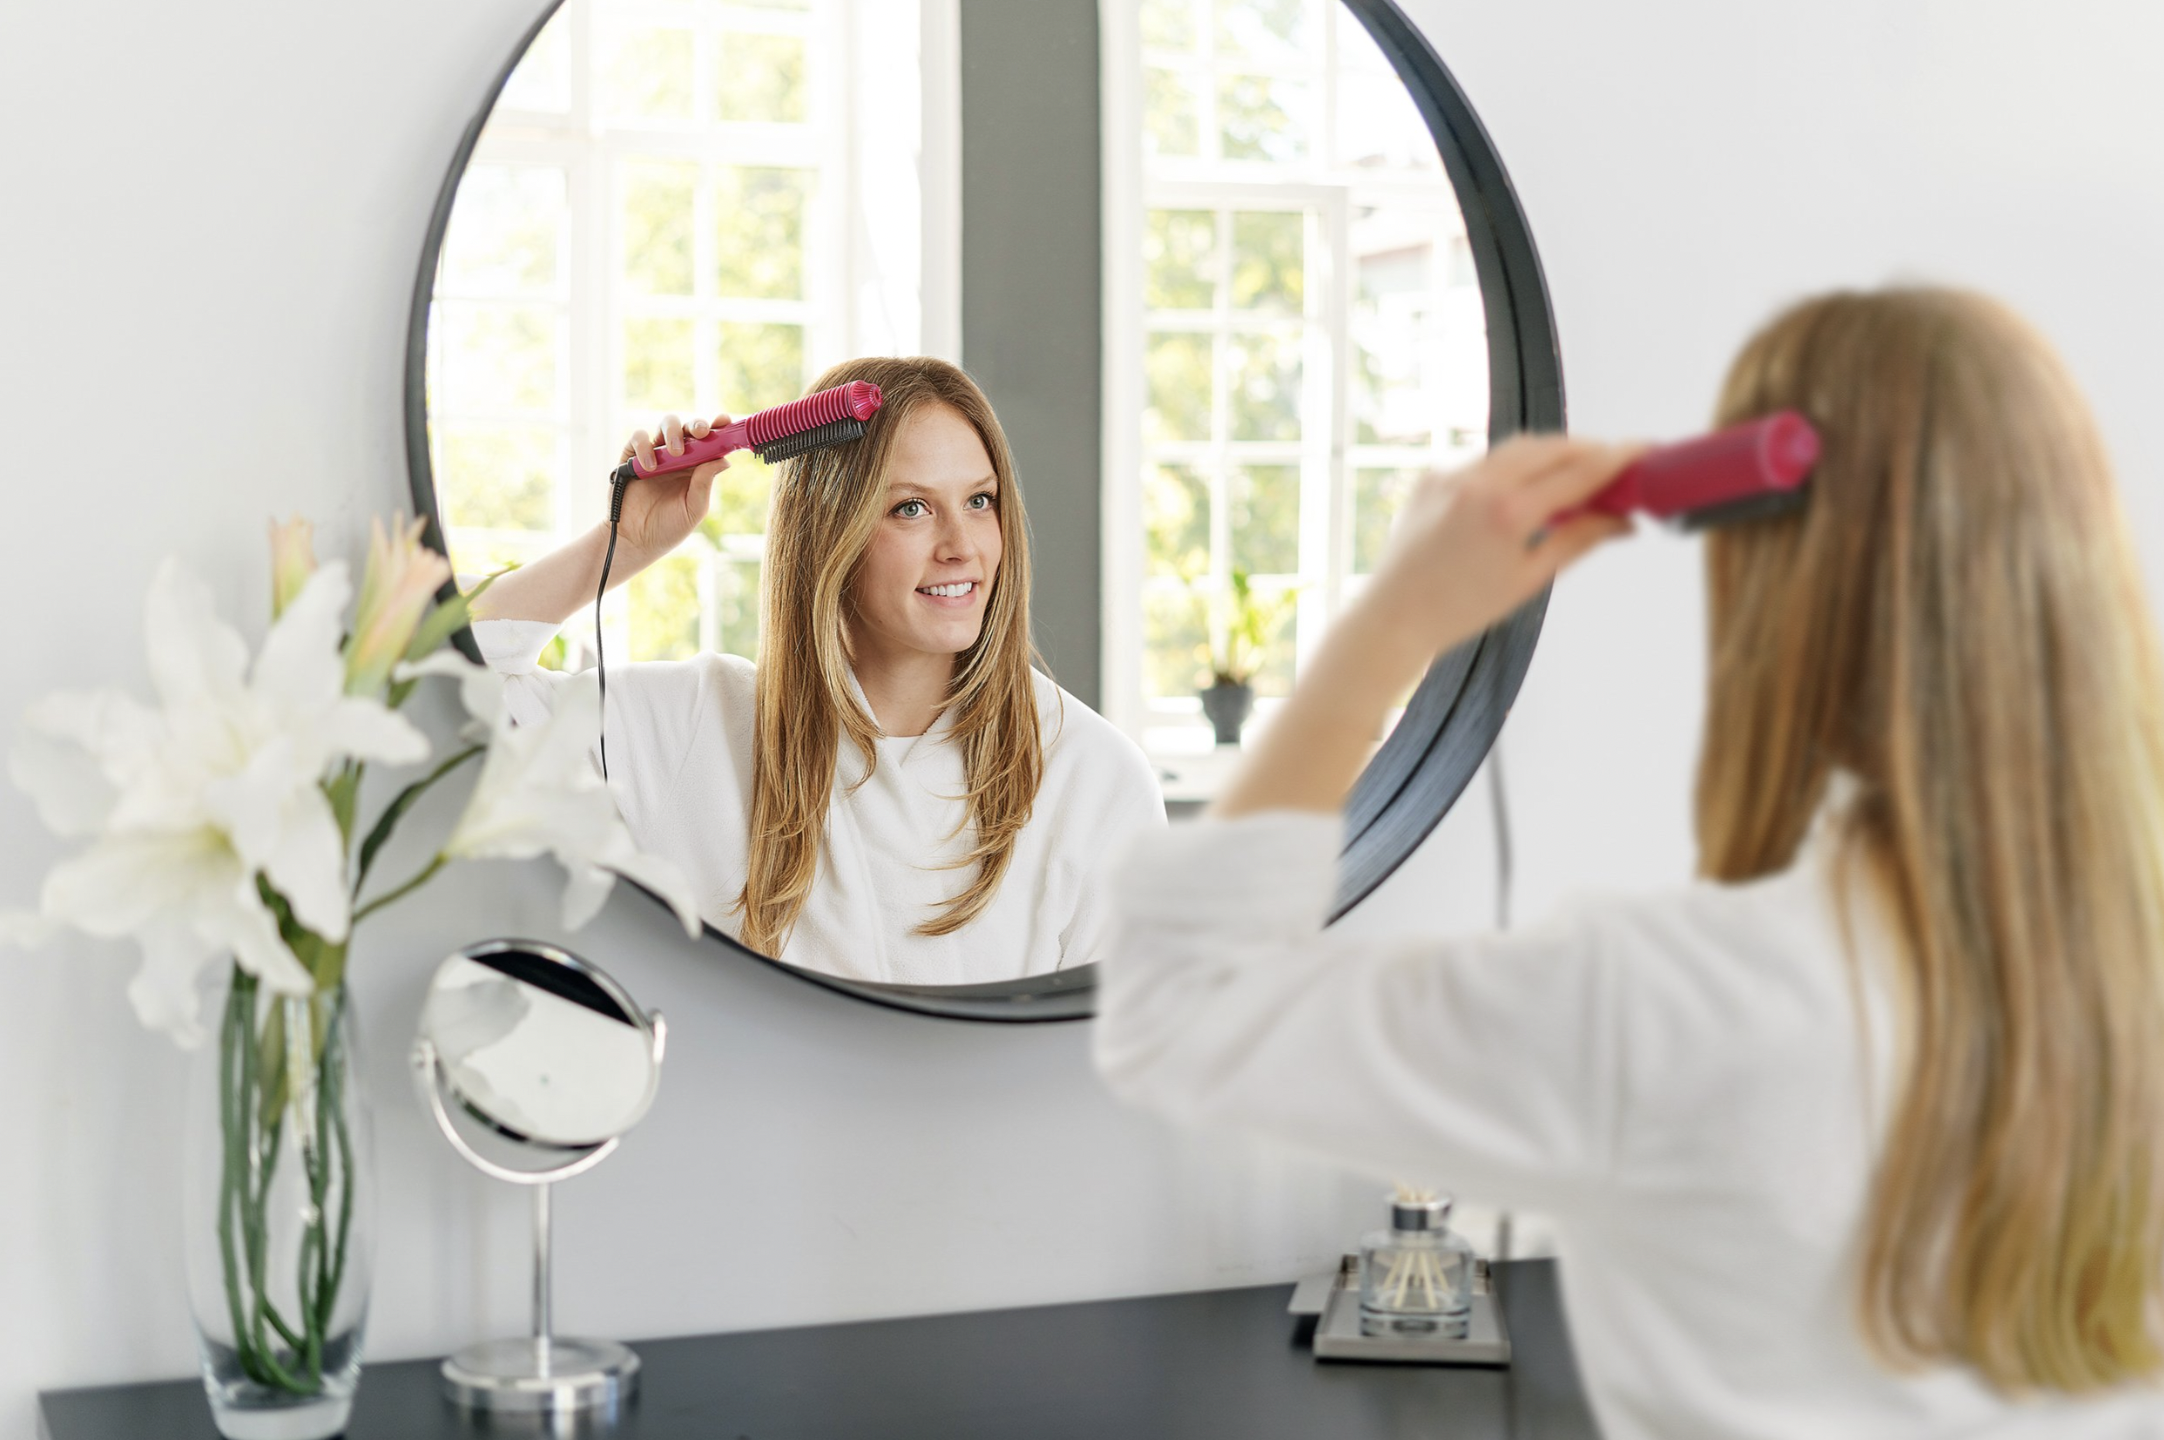
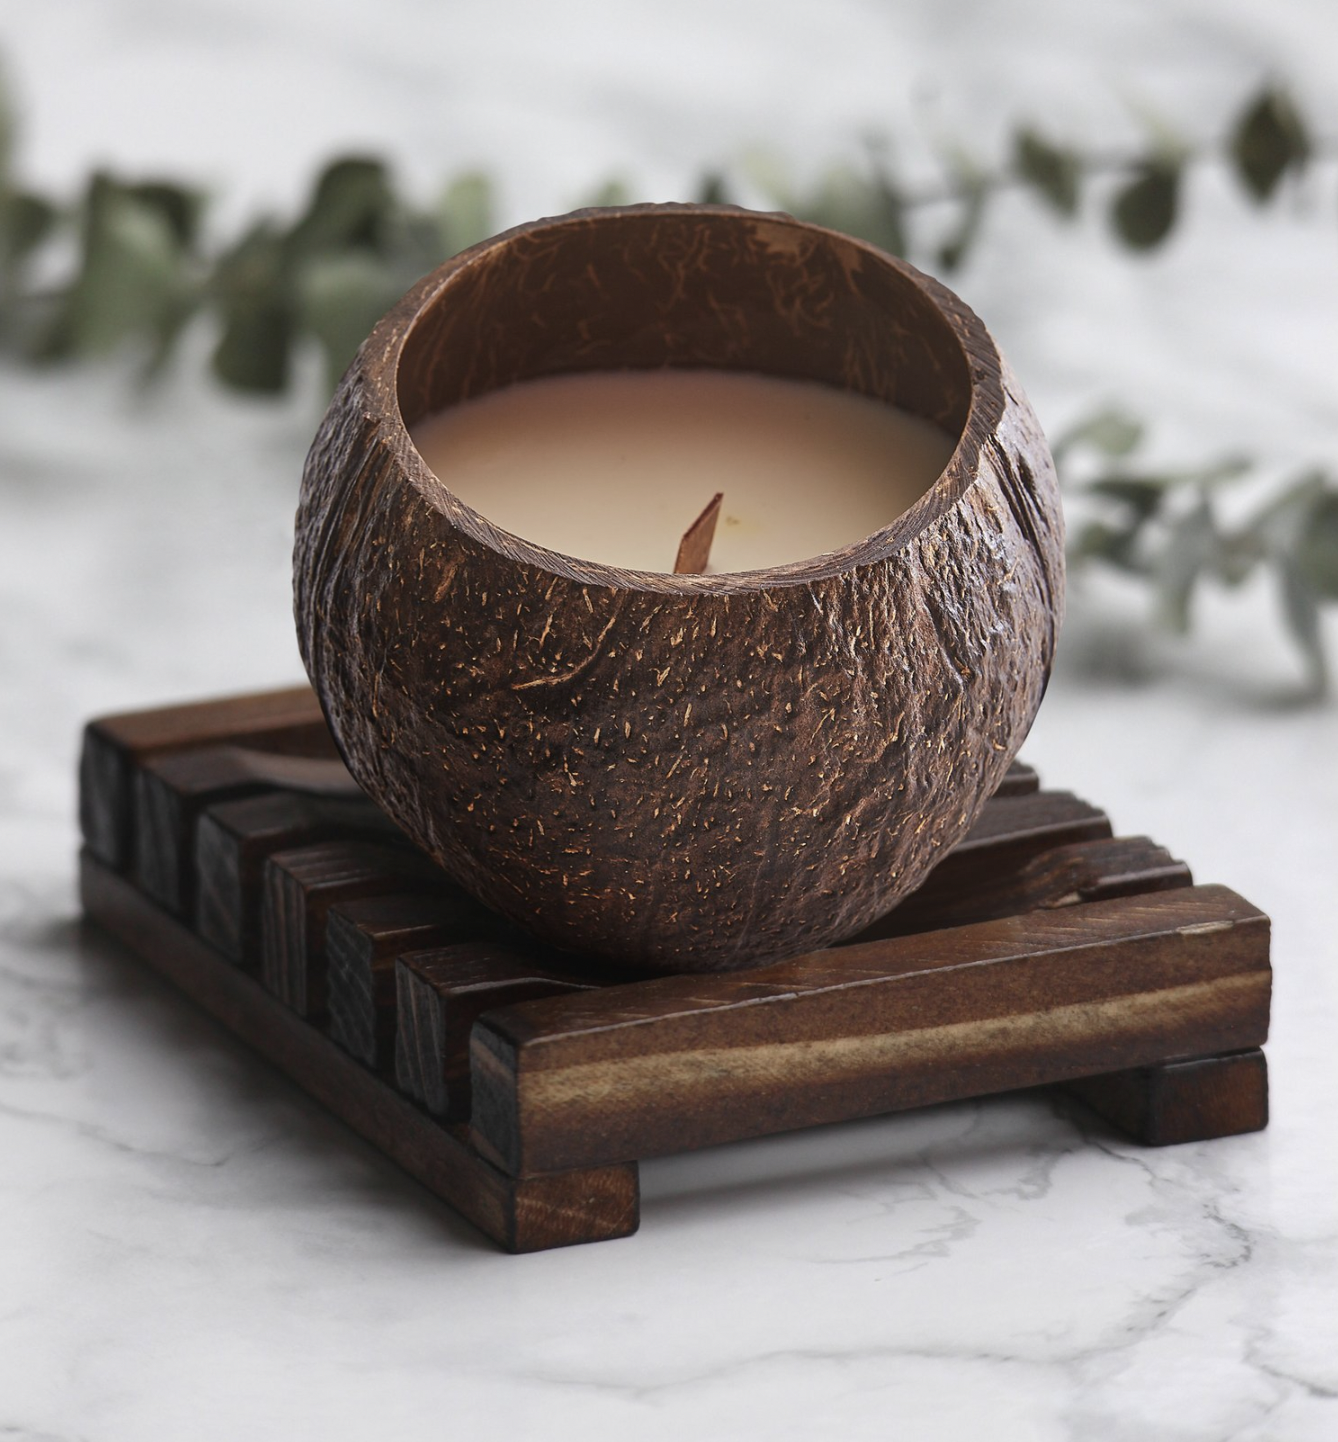
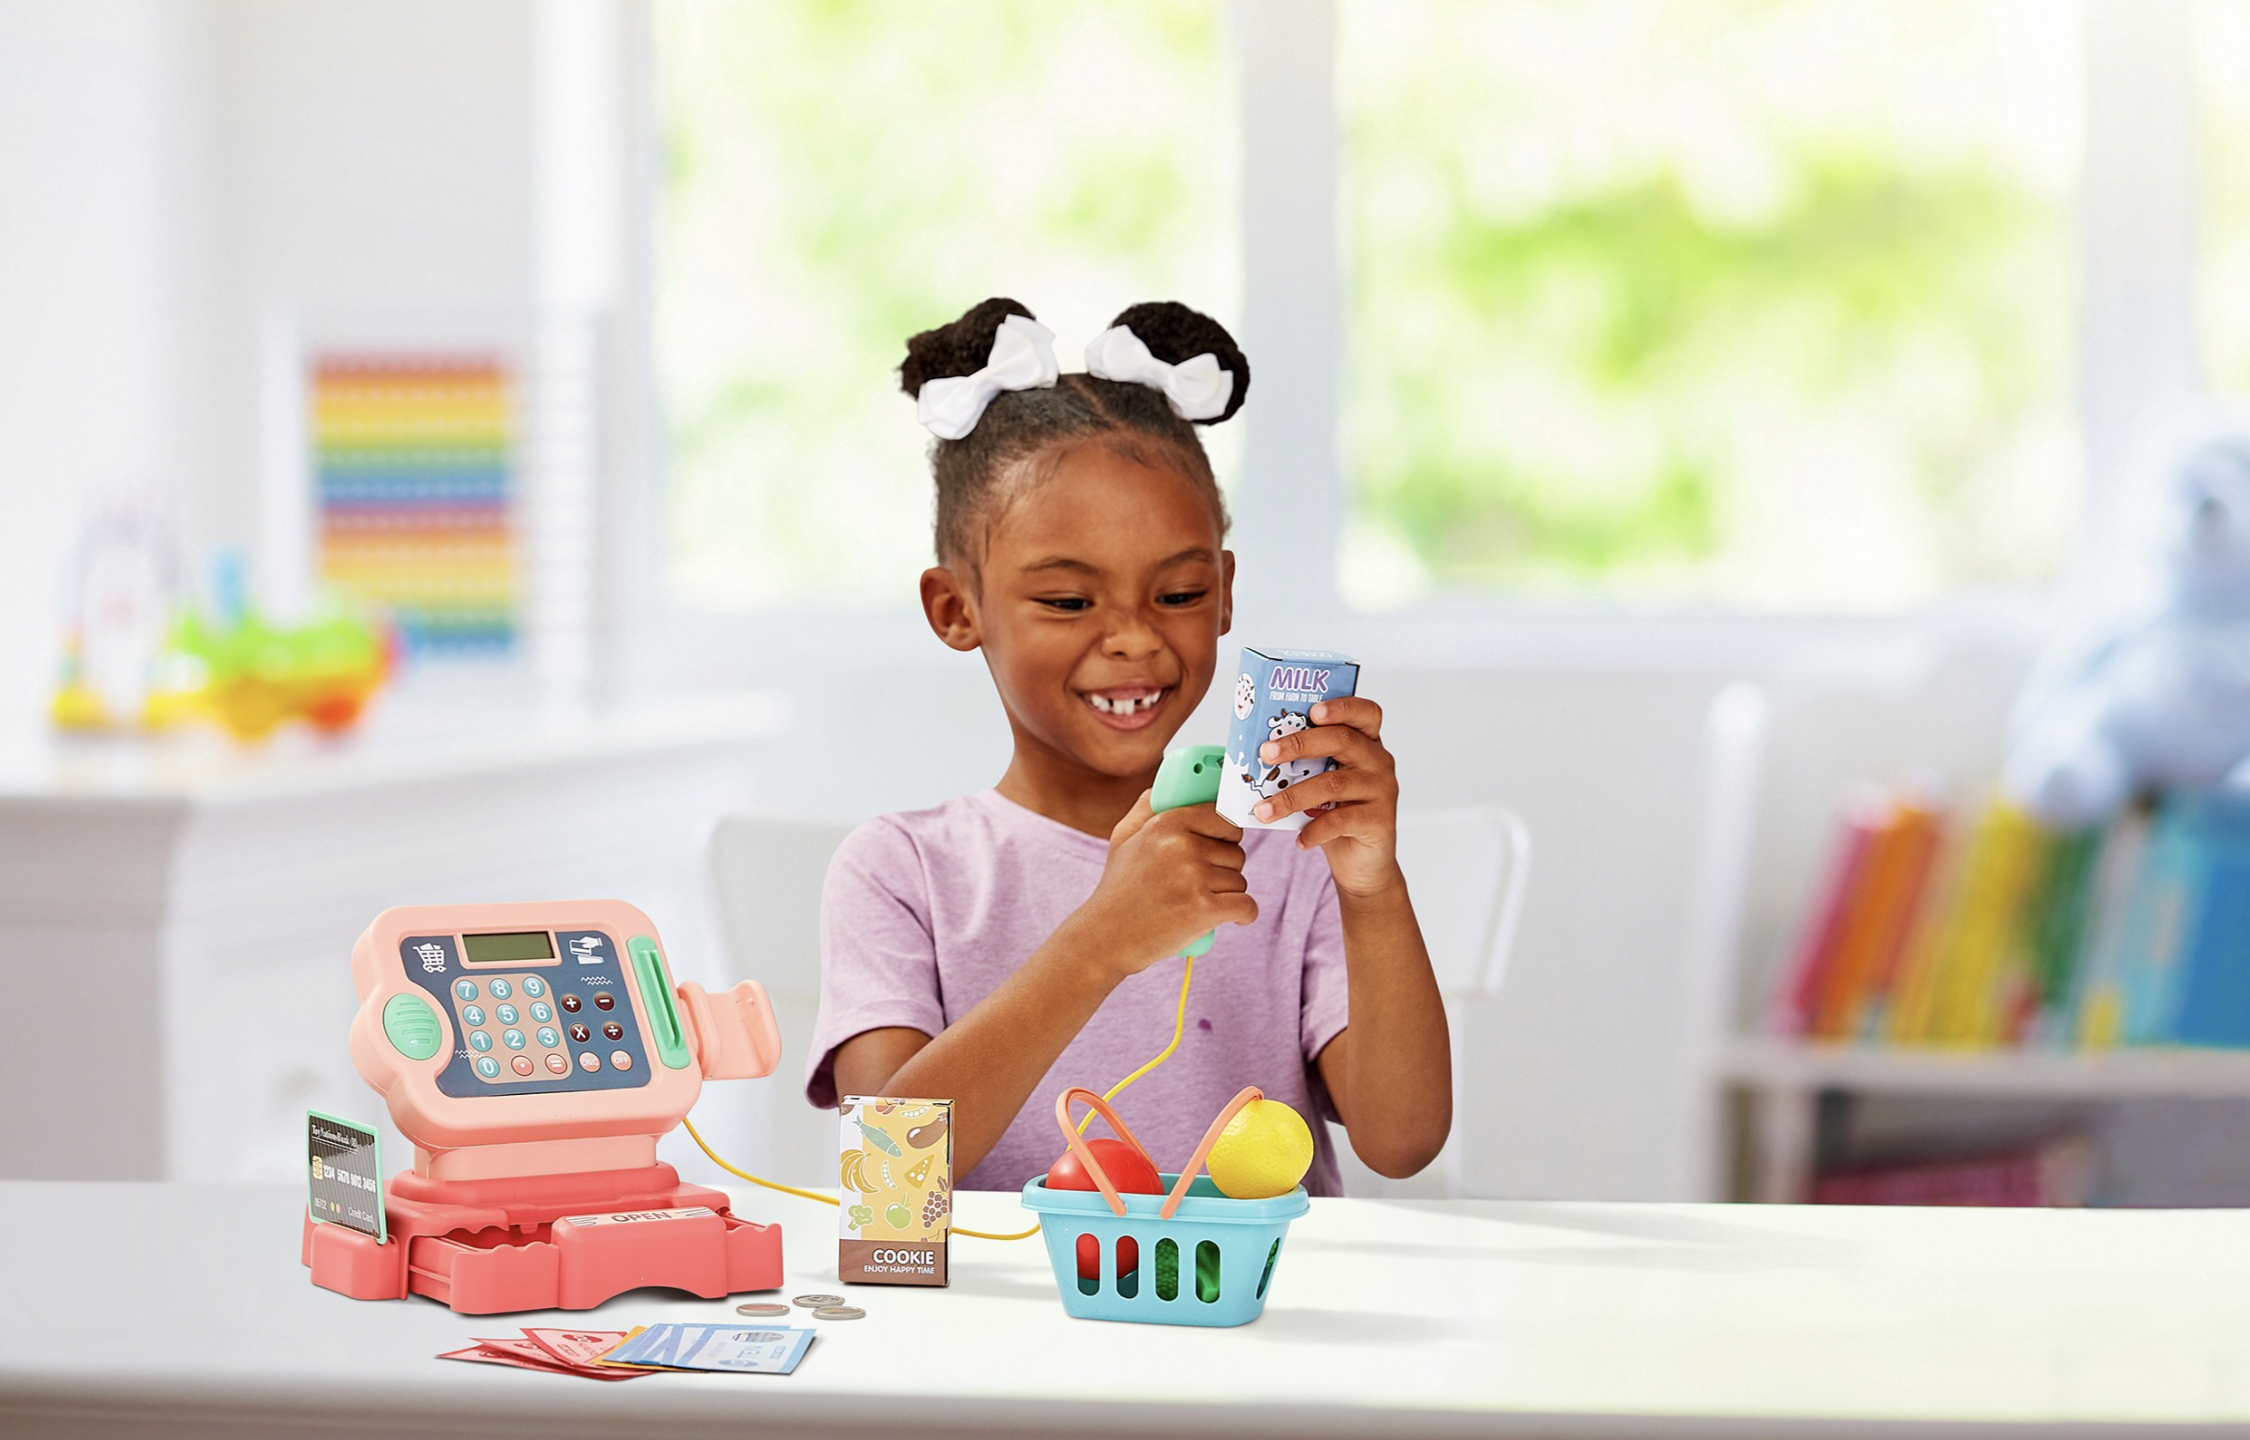
Almost all of the images that you find within our lifestyle portfolio were created using this technique. Though it has limited flexibility, it is often the most efficient and affordable option. Take a photographer and editor who know what they’re doing, an hour of production, and a $20 stock photo, and you can show your products in an environmental scene.
Sometimes the process is as simple as overlaying two 2D images, the product and the background, but sometimes more effort is required, using layering and various assets to really sell the scene as photorealistic. This is our distinction between 2D and 3D compositing.
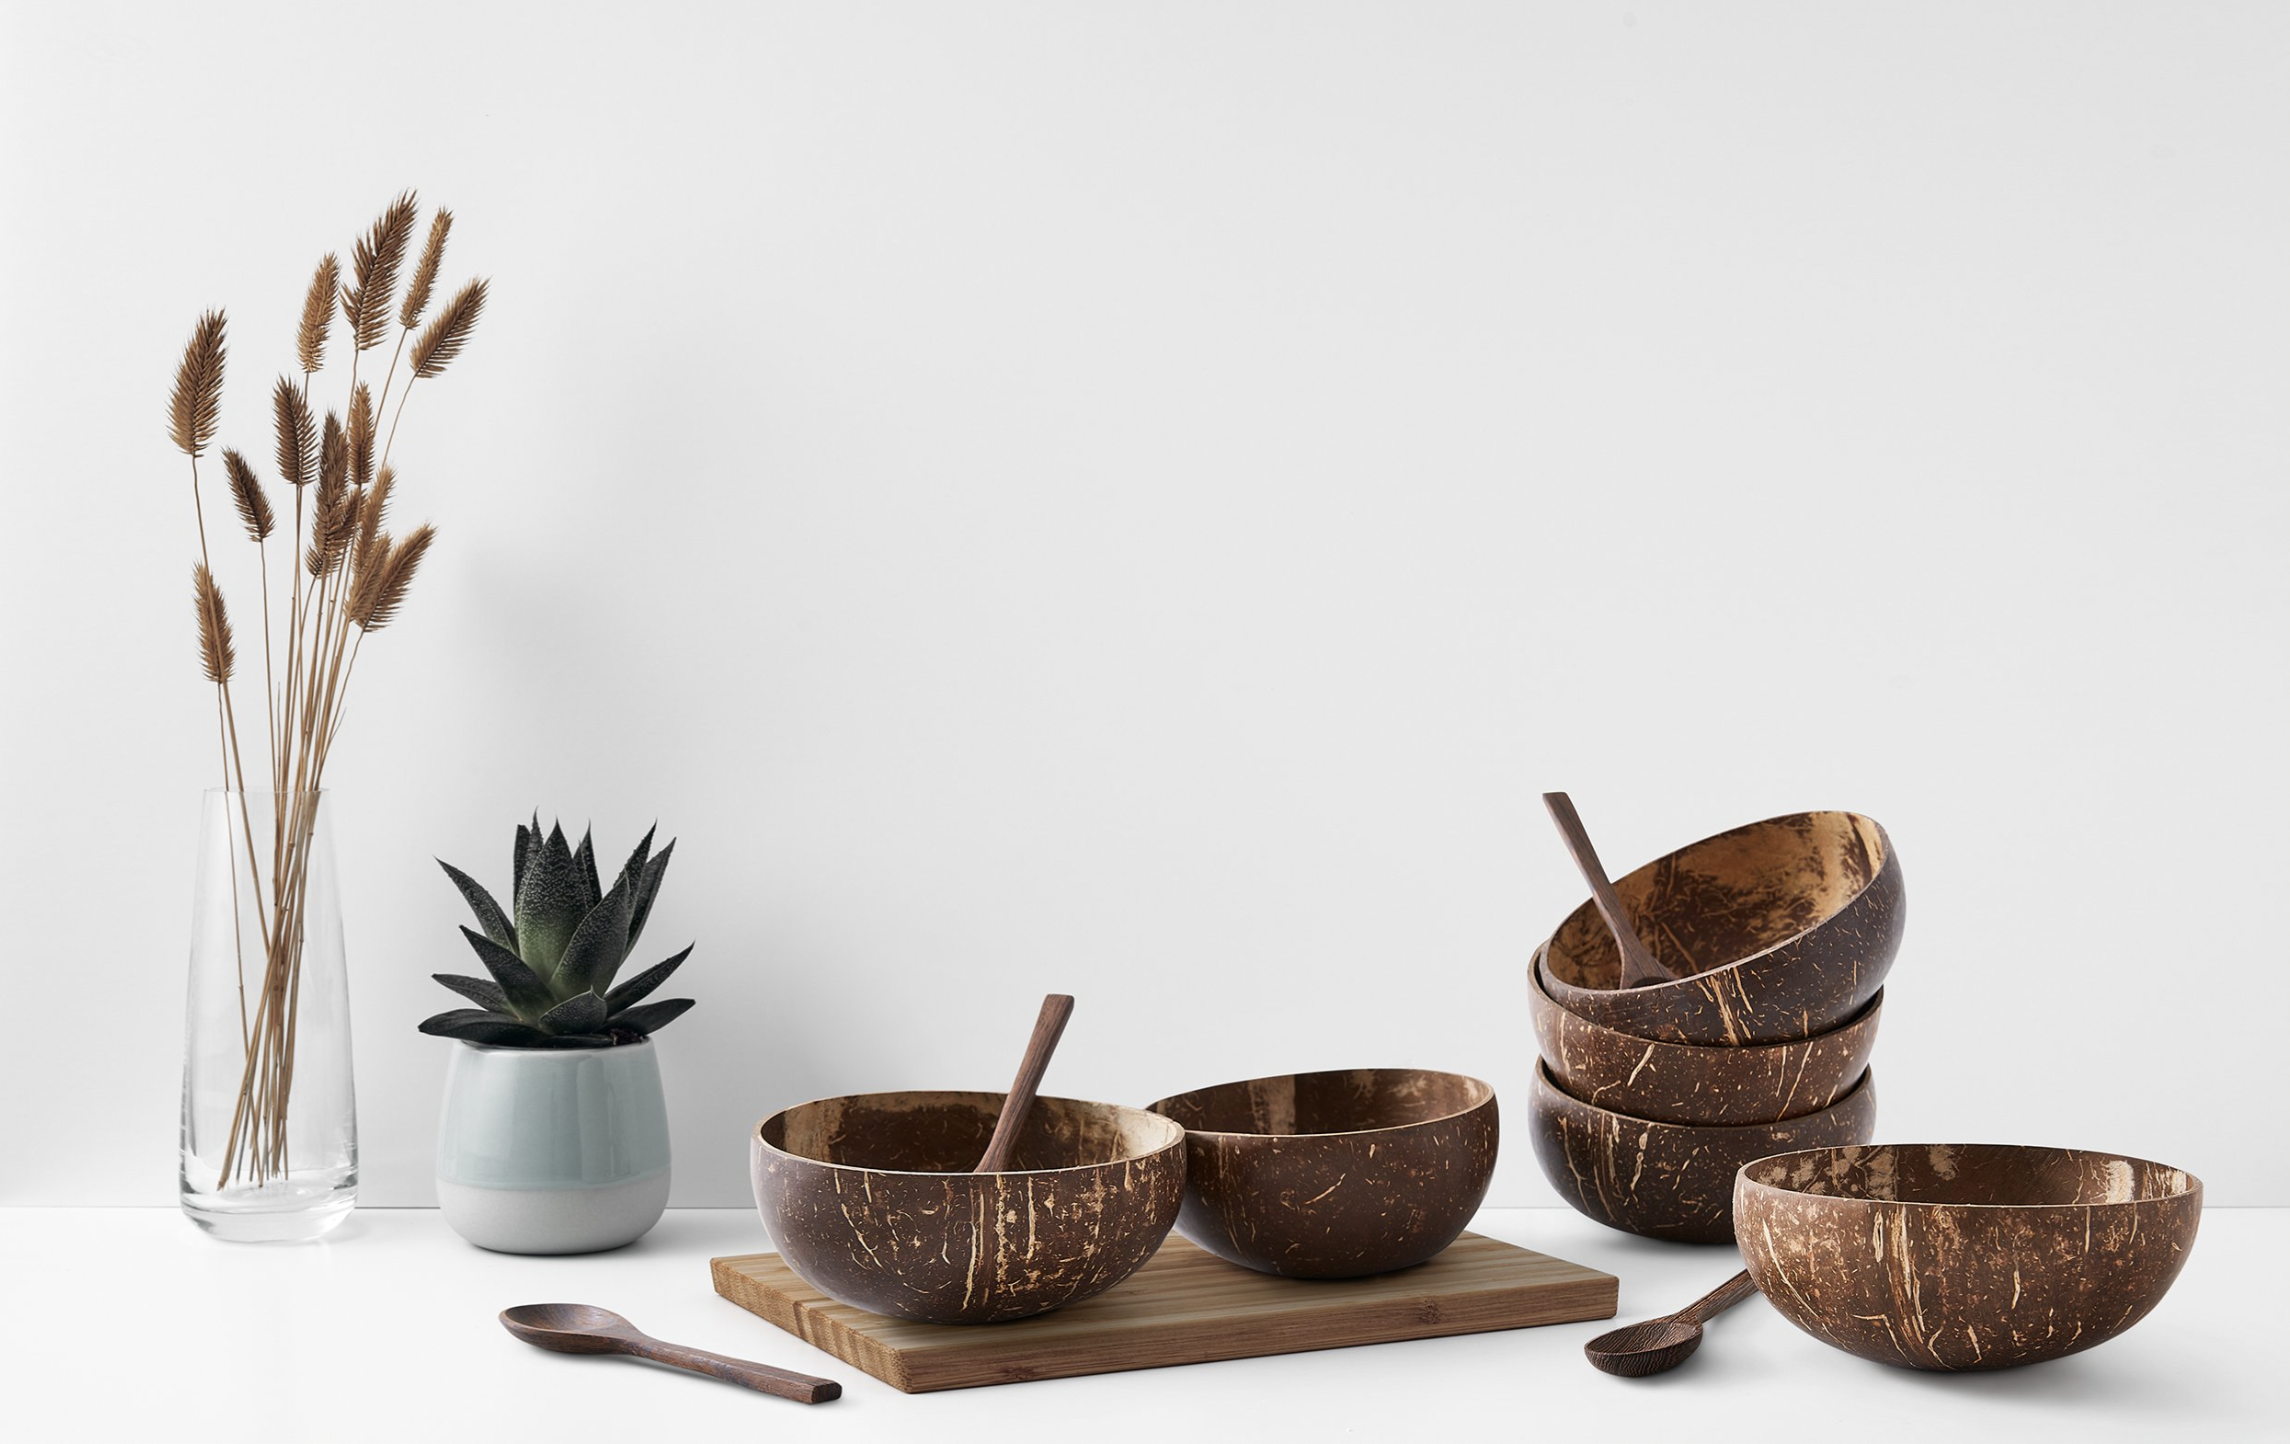
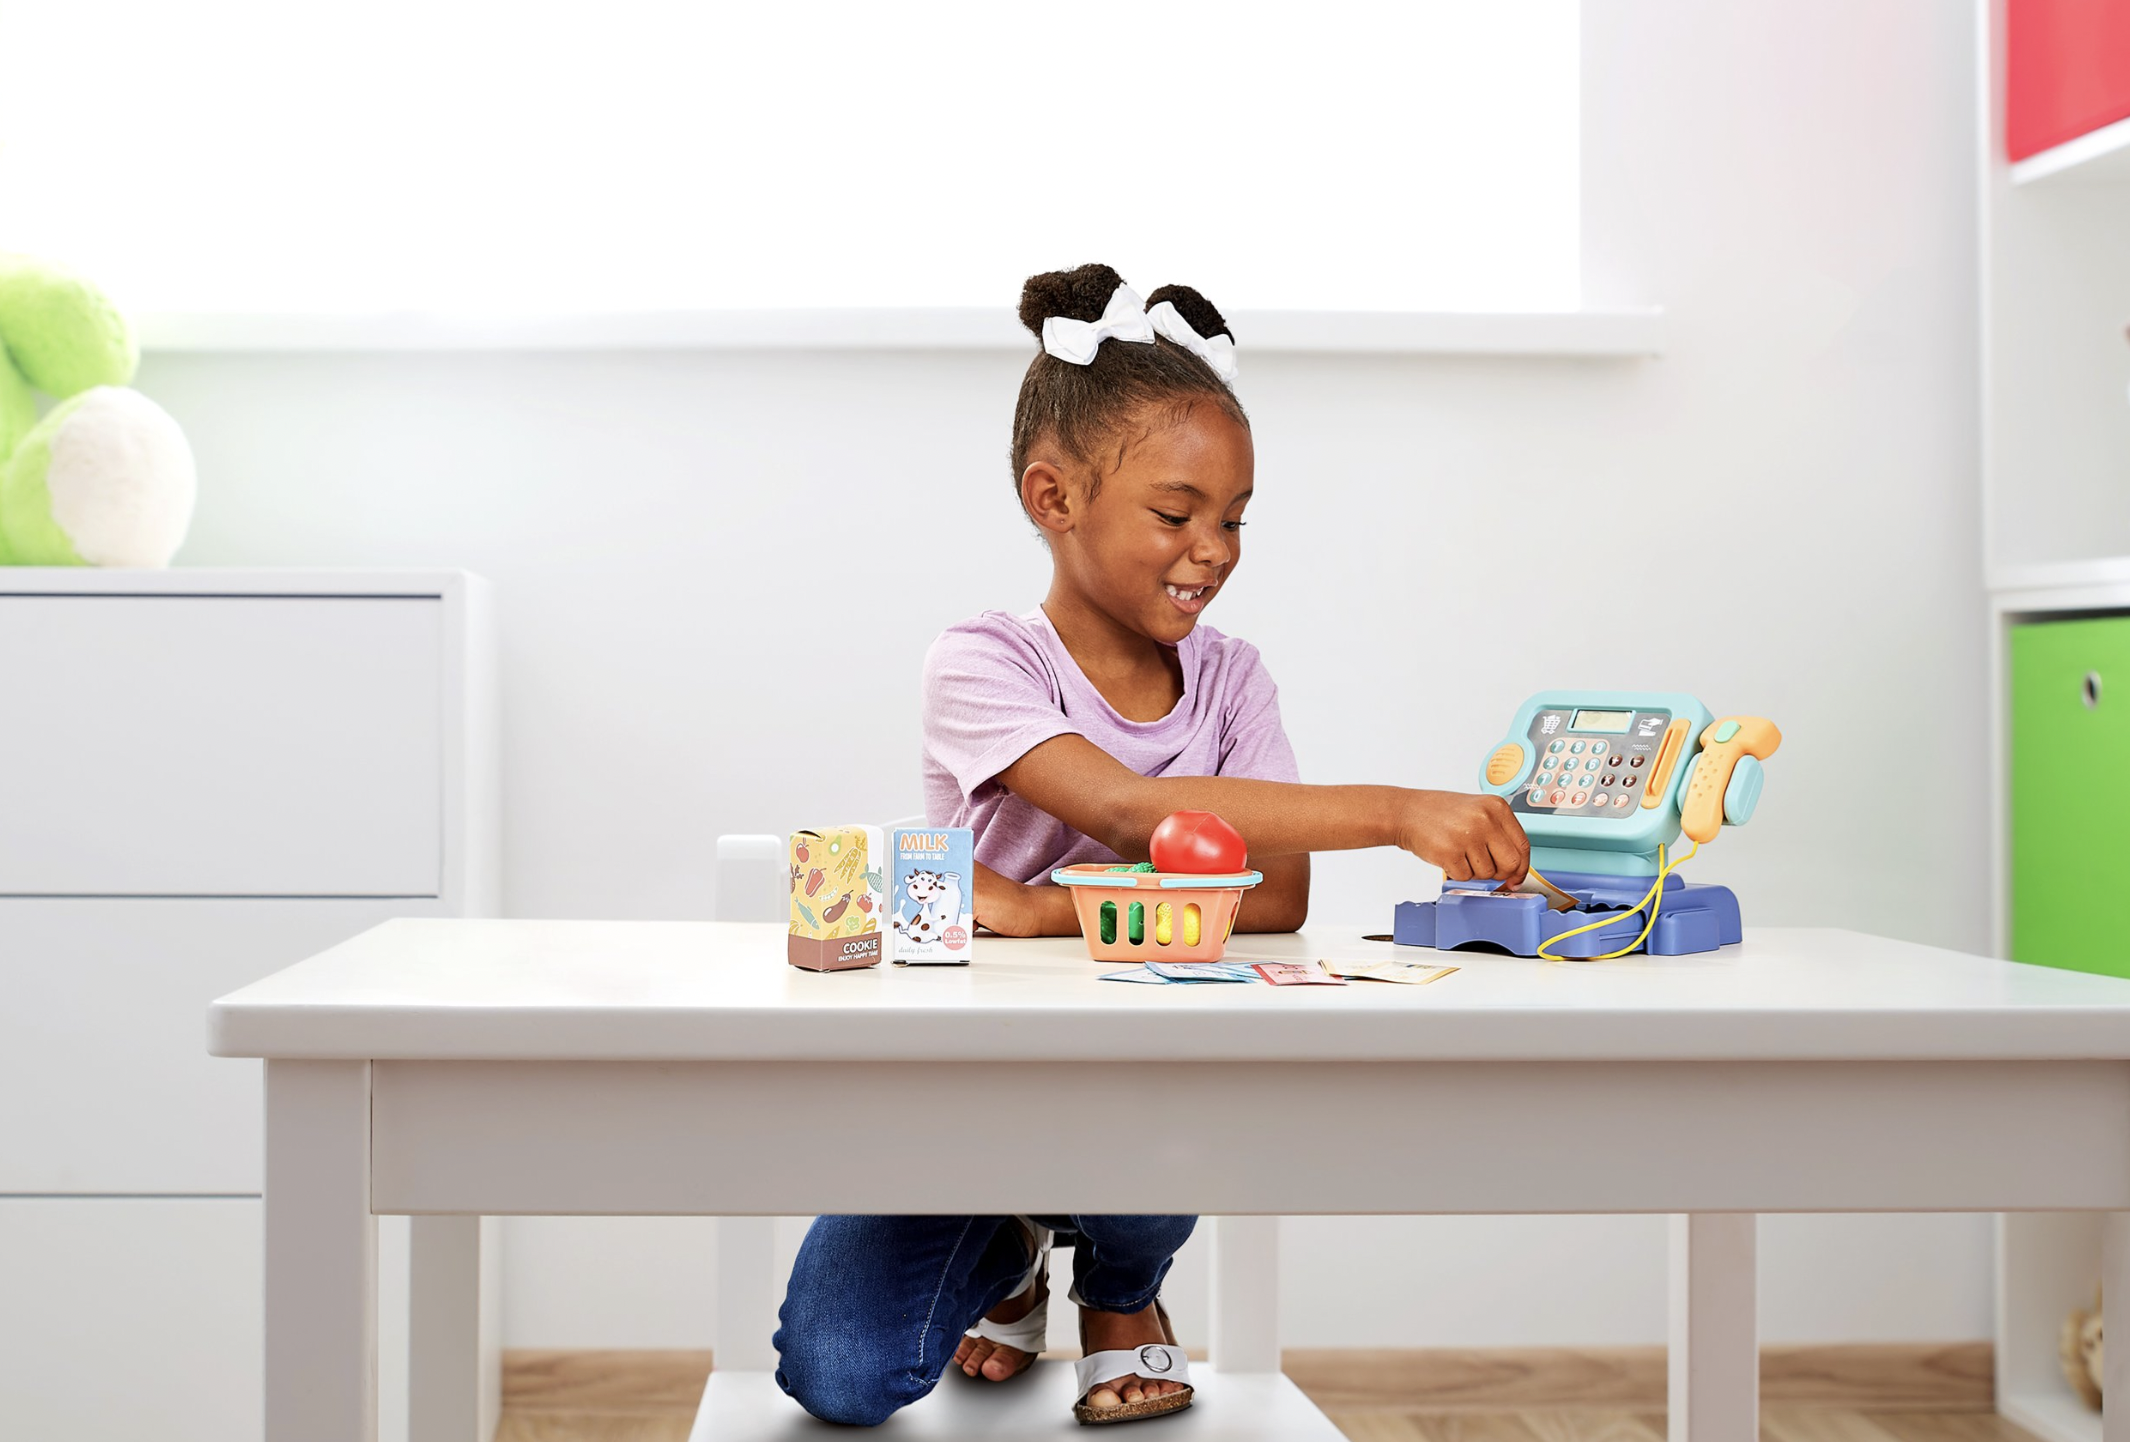
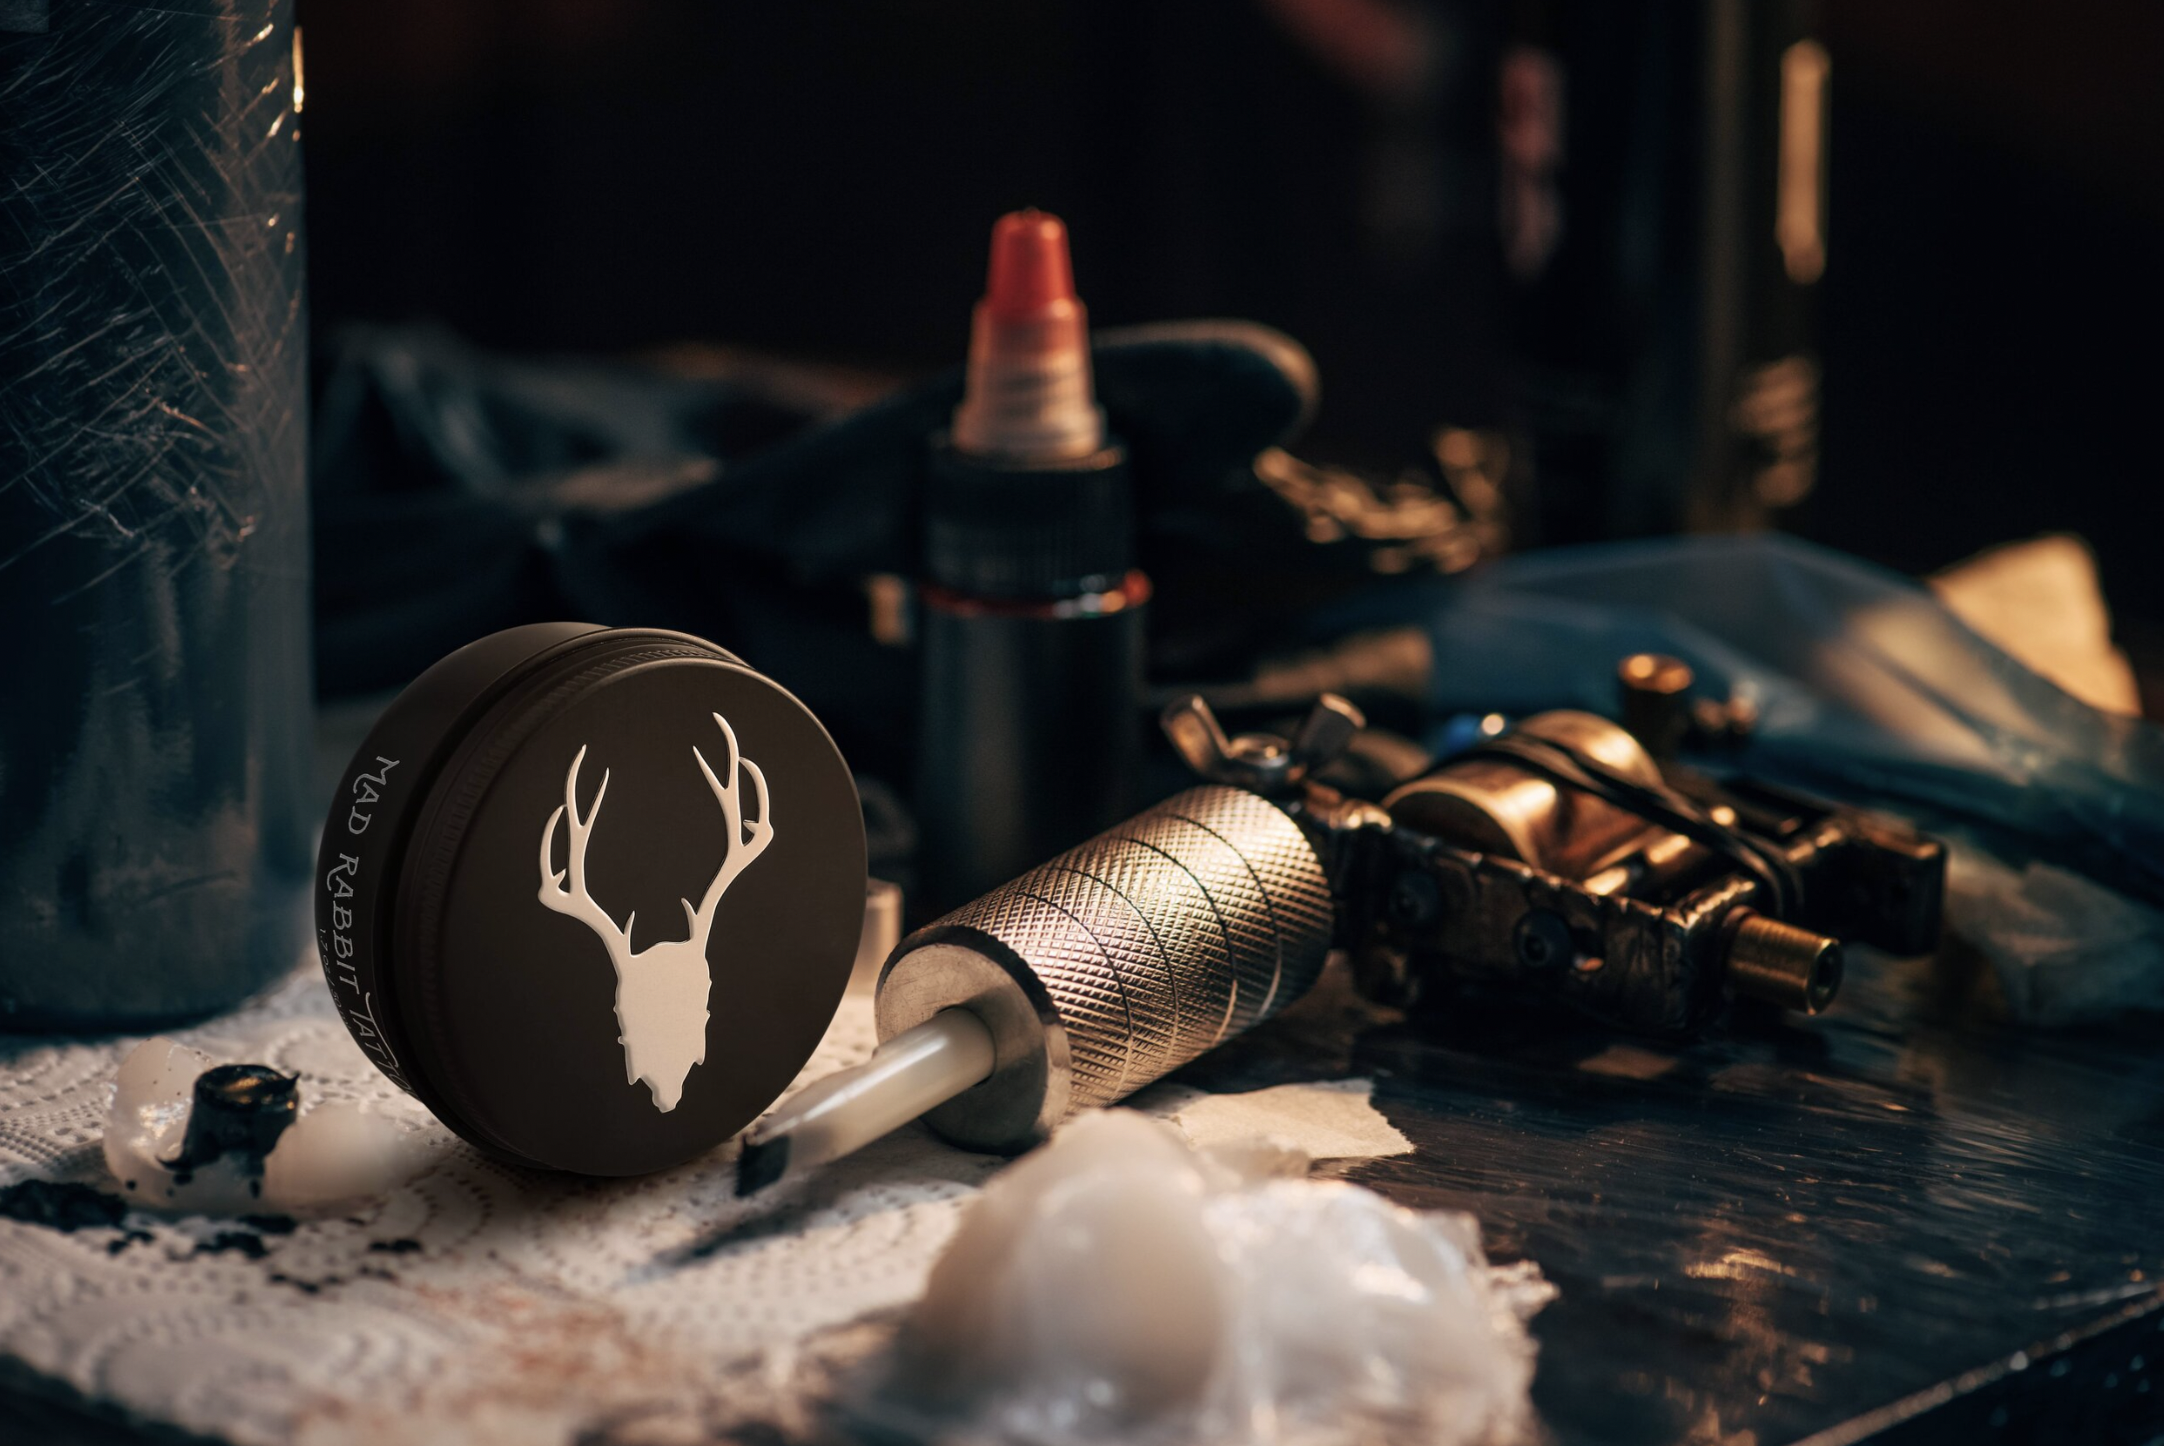
The gallery below consists of imagery created entirely in our studio, using just the product and sometimes a model.


In conclusion, there are various ways production studios can and are using 3D tools and techniques to differentiate themselves and produce captivating content for a fraction of the cost. Here at Elysian, the main 3 methods are virtual sets, product animation, and 3D compositing.
Our goal is to understand the needs, expectations, and budget of every client who comes to our studio so we can recommend the most efficient technique. Whether it’s photography, rendering, animation, or any combination, there’s a solution in this studio for everyone.
(The photos, videos, and renders within this article were produced by Elysian Studios and our sister brand, Halo Renders. Both studios work together on any 3D project.)